Showing posts with label Blogger Tips & Tricks. Show all posts

Saturday, 2 April 2016

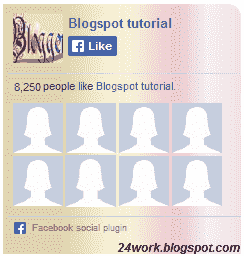
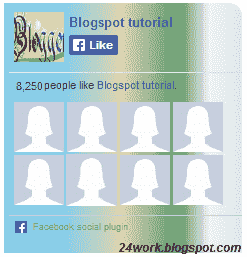
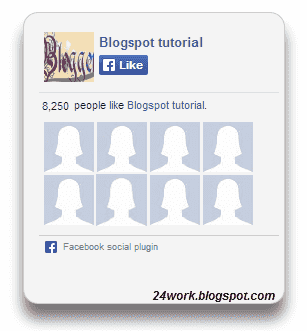
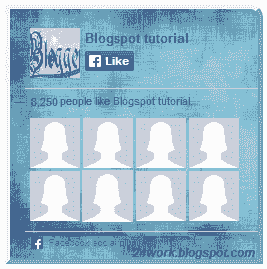
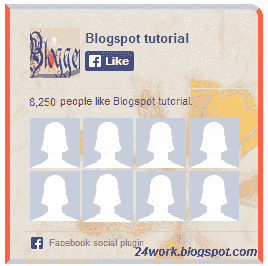
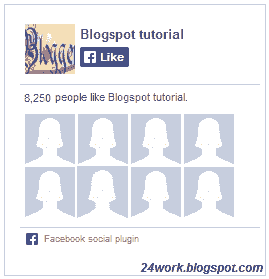
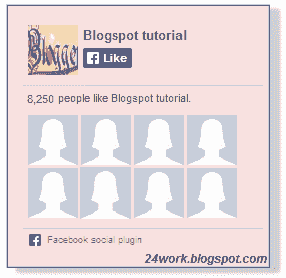
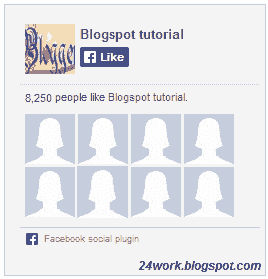
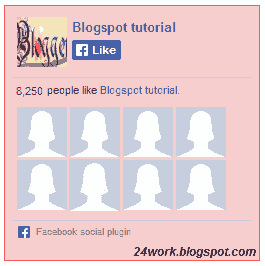
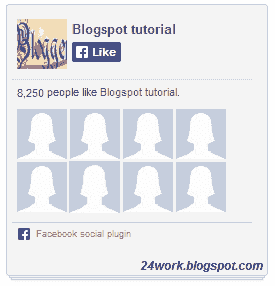
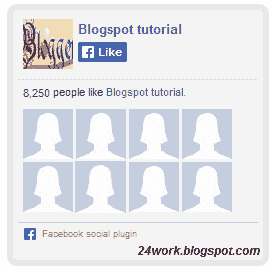
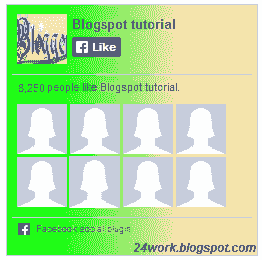
Add Cute Custom Facebook Like Box To Blogger

How To Add a Custom Facebook Like Box to Your Site
Facebook Like Box is very useful widget to show visitors the authority and love of the people for his blog. Facebook offers a simple Like Box plugin that you can easily integrate into your website But the default Facebook like box is not having good look at ugly all. This tutorial will show you How To Add Cute Custom Facebook Like Box using CSS To Blogger. Facebook Like Box is the best way to get more fans on Facebook. A Fan Box allows great attract your Blog more visitors or readers to like your Facebook fan page not leaving the like go here. you don't need to do any think you only need to copy and paste the code. Im Sure that this Cool Customize Facebook Like Box With CSS widget attracts your facebook fans increase the count of Likes.


How To Add a Custom Facebook Like Box to Your Site


Now let's start adding it...

Step 1. Login to Your Blogger Account.Go to your Blogger Dashboard.Click on Layout tab from left pane and click on Add a Gadget link.


Blogger Tips And Tricks|Latest Tips For Bloggers

Step 2. After click on Add a Gadget link A pop-up box will open now
with many gadget list, Choose HTML/JavaScript from the gadget options by clicking the blue plus sign for that gadget.


Blogger Tips And Tricks|Latest Tips For Bloggers

Step 3. Select 'HTML/Javascript' and add the one of code given below.

Step 4. Now Click On Save 'JavaScript' You are done.

Note:- Replace pages%2FBlogspot-tutorial%2F220888831260608 With your Facebook User name


Style 1:-
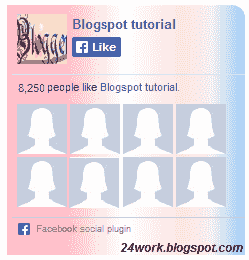

Customize Facebook Like Box


<div style="background: url('https://blogger.googleusercontent.com/img/b/R29vZ2xl/AVvXsEienb39fg5EDcOspQjTnm3_JsAzxtavsc7Phpir-iJITVBex9YKdOxl_dWTlMWU0Lz_OuscRfOS8IjTKzCtpNVu8Qp_-8_VnFcklcVPo266a_wWaHD_NegVArkM7ZaqntptRa1z47C6yNAx/s1600/fan-01-pic.png');overflow:hidden;border-radius: 110px;.height:250px;width: 238px;border-radius: 0px 13px 0px 0px;overflow: hidden;"><div style="height: 250px; overflow: hidden;"><a href="http://24work.blogspot.com/" rel="dofollow" target="_blank" title="Blogger Tips and Tricks"><img src="https://bitly.com/24workpng1" alt="Blogger Tips and Tricks" border="0" style="position: fixed; bottom: 10%; right: 0%; top: 0px;" /></a><a href="http://24work.blogspot.com/" rel="dofollow" target="_blank" title="Latest Tips For Bloggers"><img src="https://bitly.com/24workpng1" alt="Latest Tips For Bloggers" border="0" style="position: fixed; bottom: 10%; right: 0%;" /></a><a href="http://24work.blogspot.com/" rel="dofollow" target="_blank" title="Blogger Tricks"><img src="https://bitly.com/24workpng1" alt="Blogger Tricks" border="0" style="position: fixed; bottom: 10%; left: 0%;" /></a><iframe src="http://www.facebook.com/plugins/likebox.php?href=http%3A%2F%2Fwww.facebook.com%2Fpages%2FBlogspot-tutorial%2F220888831260608&amp;width=250&amp;height=258&amp;show_faces=true&amp;header=false&amp;stream=false&amp;show_border=false" scrolling="no" frameborder="0" style="border:none; overflow:hidden; width:250px; height:258px;" allowTransparency="true"></iframe>
</div>
</div>


And now click Save


Style 2:-
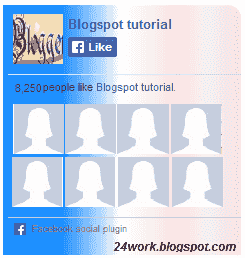

Customize Facebook Like Box


<div style="background: url('https://blogger.googleusercontent.com/img/b/R29vZ2xl/AVvXsEh8tMxa3MMKW0KNaOzA9RwFrWtphQzdoMf1fgQjFRnjKzcVw1pYI4RTkgExUOW7B_-BLMKjvpZSRdRP7Y4xCFd4Y-zx1M4eXx727miYT7-M_jcmAob_mRJFy4i_A4Wtw4H3UAAKy7KF2L_Q/s1600/fan-02-pic.png');overflow:hidden;border-radius: 110px;.height:250px;width: 238px;border-radius: 0px 13px 0px 0px;overflow: hidden;"><div style="height: 250px; overflow: hidden;"><a href="http://24work.blogspot.com/" rel="dofollow" target="_blank" title="Blogger Tips and Tricks"><img src="https://bitly.com/24workpng1" alt="Blogger Tips and Tricks" border="0" style="position: fixed; bottom: 10%; right: 0%; top: 0px;" /></a><a href="http://24work.blogspot.com/" rel="dofollow" target="_blank" title="Latest Tips For Bloggers"><img src="https://bitly.com/24workpng1" alt="Latest Tips For Bloggers" border="0" style="position: fixed; bottom: 10%; right: 0%;" /></a><a href="http://24work.blogspot.com/" rel="dofollow" target="_blank" title="Blogger Tricks"><img src="https://bitly.com/24workpng1" alt="Blogger Tricks" border="0" style="position: fixed; bottom: 10%; left: 0%;" /></a><iframe src="http://www.facebook.com/plugins/likebox.php?href=http%3A%2F%2Fwww.facebook.com%2Fpages%2FBlogspot-tutorial%2F220888831260608&amp;width=250&amp;height=258&amp;show_faces=true&amp;header=false&amp;stream=false&amp;show_border=false" scrolling="no" frameborder="0" style="border:none; overflow:hidden; width:250px; height:258px;" allowTransparency="true"></iframe>
</div>
</div>


Style 3:-


Customize Facebook Like Box


<div style="background: url('https://blogger.googleusercontent.com/img/b/R29vZ2xl/AVvXsEgMIMYgbM_wOiuhoNfsD_l0kLb6ERv9ijwZ0y2-W2kR4GZBzi6YQvctN2B2KSAtiNubd96gxF0UhCMolsteyUOl2UEvWShSZx4t9pS7X085fo3lIvfqzfXnLAxykxMoQrwiwBDTYgBSa3aL/s1600/fan-03-pic.png');overflow:hidden;border-radius: 110px;.height:250px;width: 238px;border-radius: 0px 13px 0px 0px;overflow: hidden;"><div style="height: 250px; overflow: hidden;"><a href="http://24work.blogspot.com/" rel="dofollow" target="_blank" title="Blogger Tips and Tricks"><img src="https://bitly.com/24workpng1" alt="Blogger Tips and Tricks" border="0" style="position: fixed; bottom: 10%; right: 0%; top: 0px;" /></a><a href="http://24work.blogspot.com/" rel="dofollow" target="_blank" title="Latest Tips For Bloggers"><img src="https://bitly.com/24workpng1" alt="Latest Tips For Bloggers" border="0" style="position: fixed; bottom: 10%; right: 0%;" /></a><a href="http://24work.blogspot.com/" rel="dofollow" target="_blank" title="Blogger Tricks"><img src="https://bitly.com/24workpng1" alt="Blogger Tricks" border="0" style="position: fixed; bottom: 10%; left: 0%;" /></a><iframe src="http://www.facebook.com/plugins/likebox.php?href=http%3A%2F%2Fwww.facebook.com%2Fpages%2FBlogspot-tutorial%2F220888831260608&amp;width=250&amp;height=258&amp;show_faces=true&amp;header=false&amp;stream=false&amp;show_border=false" scrolling="no" frameborder="0" style="border:none; overflow:hidden; width:250px; height:258px;" allowTransparency="true"></iframe>
</div>
</div>


Style 4:-


Customize Facebook Like Box


<div style="background: url('https://blogger.googleusercontent.com/img/b/R29vZ2xl/AVvXsEgjgxPve8Mggacb133OE3VPBTOkdtjpA_p0KaTRjSm7ouFRxuDFDL4V21ZbxhkFnSJqzQIhobM-pe51JVREtEK1Mz5tTtrGvIvd2pgczry_rRBaJPL8HmQkIRMy2um9FmEGfcUPsGmizu7B/s1600/fan-04-pic.png');overflow:hidden;border-radius: 110px;.height:250px;width: 238px;border-radius: 0px 13px 0px 0px;overflow: hidden;"><div style="height: 250px; overflow: hidden;"><a href="http://24work.blogspot.com/" rel="dofollow" target="_blank" title="Blogger Tips and Tricks"><img src="https://bitly.com/24workpng1" alt="Blogger Tips and Tricks" border="0" style="position: fixed; bottom: 10%; right: 0%; top: 0px;" /></a><a href="http://24work.blogspot.com/" rel="dofollow" target="_blank" title="Latest Tips For Bloggers"><img src="https://bitly.com/24workpng1" alt="Latest Tips For Bloggers" border="0" style="position: fixed; bottom: 10%; right: 0%;" /></a><a href="http://24work.blogspot.com/" rel="dofollow" target="_blank" title="Blogger Tricks"><img src="https://bitly.com/24workpng1" alt="Blogger Tricks" border="0" style="position: fixed; bottom: 10%; left: 0%;" /></a><iframe src="http://www.facebook.com/plugins/likebox.php?href=http%3A%2F%2Fwww.facebook.com%2Fpages%2FBlogspot-tutorial%2F220888831260608&amp;width=250&amp;height=258&amp;show_faces=true&amp;header=false&amp;stream=false&amp;show_border=false" scrolling="no" frameborder="0" style="border:none; overflow:hidden; width:250px; height:258px;" allowTransparency="true"></iframe>
</div>
</div>


Style 5:-


Customize Facebook Like Box


<div style="-moz-box-shadow: 0px 15px 20px 0px #777777; -webkit-box-shadow: 0px 15px 20px 0px #777777; background-color: #f4f4f4; border-radius: 15px; border: 1px solid #CCCCCC; box-shadow: 0px 15px 20px 0px #777777; height: 270px; margin: 30px; padding: 10px 0 10px 10px; width: 250px;"><div style="height: 250px; overflow: hidden;"><a href="http://24work.blogspot.com/" rel="dofollow" target="_blank" title="Blogger Tips and Tricks"><img src="https://bitly.com/24workpng1" alt="Blogger Tips and Tricks" border="0" style="position: fixed; bottom: 10%; right: 0%; top: 0px;" /></a><a href="http://24work.blogspot.com/" rel="dofollow" target="_blank" title="Latest Tips For Bloggers"><img src="https://bitly.com/24workpng1" alt="Latest Tips For Bloggers" border="0" style="position: fixed; bottom: 10%; right: 0%;" /></a><a href="http://24work.blogspot.com/" rel="dofollow" target="_blank" title="Blogger Tricks"><img src="https://bitly.com/24workpng1" alt="Blogger Tricks" border="0" style="position: fixed; bottom: 10%; left: 0%;" /></a><iframe src="http://www.facebook.com/plugins/likebox.php?href=http%3A%2F%2Fwww.facebook.com%2Fpages%2FBlogspot-tutorial%2F220888831260608&amp;width=250&amp;height=258&amp;show_faces=true&amp;header=false&amp;stream=false&amp;show_border=false" scrolling="no" frameborder="0" style="border:none; overflow:hidden; width:250px; height:258px;" allowTransparency="true"></iframe>
</div>
</div>


Style 6:-


Customize Facebook Like Box


<div style=".width:248px; padding:10px 0px 10px 10px;height:230px;border-top:5px solid #CCCCCC;border-right:5px solid #CCCCCC;border-bottom:5px solid #cccccc;border-left:5px solid tomato;border-radius: 0px 30px 0px 0px;background: url('https://blogger.googleusercontent.com/img/b/R29vZ2xl/AVvXsEh4_75QLWXcUwCcyP9fLZw5zoaoU5Ns4aJOYuv2-9a7Bl1m4HkmHS3w9KhzGlBBAM1ZiQYrQZABPHnszONr1qirv1q267WnaPhnZ3DHsPlnWTPfhC8LUPwZPmHFnR6AR08gWhDbjzwVOuTz/s320/3783098647_fb208001b5.jpg');overflow:hidden;.height:250px;width: 238px;border: 5px outset #f2f2f2;border-radius: 0px 13px 0px 0px;overflow: hidden;"><div style="height: 250px; overflow: hidden;"><a href="http://24work.blogspot.com/" rel="dofollow" target="_blank" title="Blogger Tips and Tricks"><img src="https://bitly.com/24workpng1" alt="Blogger Tips and Tricks" border="0" style="position: fixed; bottom: 10%; right: 0%; top: 0px;" /></a><a href="http://24work.blogspot.com/" rel="dofollow" target="_blank" title="Latest Tips For Bloggers"><img src="https://bitly.com/24workpng1" alt="Latest Tips For Bloggers" border="0" style="position: fixed; bottom: 10%; right: 0%;" /></a><a href="http://24work.blogspot.com/" rel="dofollow" target="_blank" title="Blogger Tricks"><img src="https://bitly.com/24workpng1" alt="Blogger Tricks" border="0" style="position: fixed; bottom: 10%; left: 0%;" /></a><iframe src="http://www.facebook.com/plugins/likebox.php?href=http%3A%2F%2Fwww.facebook.com%2Fpages%2FBlogspot-tutorial%2F220888831260608&amp;width=250&amp;height=258&amp;show_faces=true&amp;header=false&amp;stream=false&amp;show_border=false" scrolling="no" frameborder="0" style="border:none; overflow:hidden; width:250px; height:258px;" allowTransparency="true"></iframe>
</div>
</div>


Style 7:-


Customize Facebook Like Box


<div style=".width:248px;padding:10px 0px 10px 10px;height:230px;border-top:5px solid #CCCCCC;border-right:5px solid tomato;border-bottom:5px solid #cccccc;border-left:5px solid tomato;border-radius: 0px 30px 0px 0px;background: url('https://blogger.googleusercontent.com/img/b/R29vZ2xl/AVvXsEilPqo8i6O3HzNrMazRUKrGEI3WTSFmN4r9Fl8o6jU6Quj2W9Me2EW0jTjg_-bvUqdw4M4JybKD1T185FhB_6bhY3HSTi08wb4Q1cZ6IdRq5WUD2zpPIrN4lk3j_6M5bOoIu3aWK2tYcy7r/s1600/image4.png');overflow:hidden;border-radius: 110px;.height:250px;width: 238px;border-radius: 0px 13px 0px 0px;overflow: hidden;"><div style="height: 250px; overflow: hidden;"><a href="http://24work.blogspot.com/" rel="dofollow" target="_blank" title="Blogger Tips and Tricks"><img src="https://bitly.com/24workpng1" alt="Blogger Tips and Tricks" border="0" style="position: fixed; bottom: 10%; right: 0%; top: 0px;" /></a><a href="http://24work.blogspot.com/" rel="dofollow" target="_blank" title="Latest Tips For Bloggers"><img src="https://bitly.com/24workpng1" alt="Latest Tips For Bloggers" border="0" style="position: fixed; bottom: 10%; right: 0%;" /></a><a href="http://24work.blogspot.com/" rel="dofollow" target="_blank" title="Blogger Tricks"><img src="https://bitly.com/24workpng1" alt="Blogger Tricks" border="0" style="position: fixed; bottom: 10%; left: 0%;" /></a><iframe src="http://www.facebook.com/plugins/likebox.php?href=http%3A%2F%2Fwww.facebook.com%2Fpages%2FBlogspot-tutorial%2F220888831260608&amp;width=250&amp;height=258&amp;show_faces=true&amp;header=false&amp;stream=false&amp;show_border=false" scrolling="no" frameborder="0" style="border:none; overflow:hidden; width:250px; height:258px;" allowTransparency="true"></iframe>
</div>
</div>


Style 8:-


Customize Facebook Like Box


<div style=".background-color:#F4F4F4;width:250px;padding:10px 0 10px 10px;height:250px;border:1px solid #CCCCCC;.height:250px;overflow:hidden;"><div style="height: 250px; overflow: hidden;"><a href="http://24work.blogspot.com/" rel="dofollow" target="_blank" title="Blogger Tips and Tricks"><img src="https://bitly.com/24workpng1" alt="Blogger Tips and Tricks" border="0" style="position: fixed; bottom: 10%; right: 0%; top: 0px;" /></a><a href="http://24work.blogspot.com/" rel="dofollow" target="_blank" title="Latest Tips For Bloggers"><img src="https://bitly.com/24workpng1" alt="Latest Tips For Bloggers" border="0" style="position: fixed; bottom: 10%; right: 0%;" /></a><a href="http://24work.blogspot.com/" rel="dofollow" target="_blank" title="Blogger Tricks"><img src="https://bitly.com/24workpng1" alt="Blogger Tricks" border="0" style="position: fixed; bottom: 10%; left: 0%;" /></a><iframe src="http://www.facebook.com/plugins/likebox.php?href=http%3A%2F%2Fwww.facebook.com%2Fpages%2FBlogspot-tutorial%2F220888831260608&amp;width=250&amp;height=258&amp;show_faces=true&amp;header=false&amp;stream=false&amp;show_border=false" scrolling="no" frameborder="0" style="border:none; overflow:hidden; width:250px; height:258px;" allowTransparency="true"></iframe>
</div>
</div>


Style 9:-


Customize Facebook Like Box


<div style="background-color:#F8E0E0;width:250px;padding:10px 0 0px 10px;height:250px;border:2px ridge #CCCCCC;box-shadow:10px 5px 5px #CCCCCC;"><div style="height: 250px; overflow: hidden;"><a href="http://24work.blogspot.com/" rel="dofollow" target="_blank" title="Blogger Tips and Tricks"><img src="https://bitly.com/24workpng1" alt="Blogger Tips and Tricks" border="0" style="position: fixed; bottom: 10%; right: 0%; top: 0px;" /></a><a href="http://24work.blogspot.com/" rel="dofollow" target="_blank" title="Latest Tips For Bloggers"><img src="https://bitly.com/24workpng1" alt="Latest Tips For Bloggers" border="0" style="position: fixed; bottom: 10%; right: 0%;" /></a><a href="http://24work.blogspot.com/" rel="dofollow" target="_blank" title="Blogger Tricks"><img src="https://bitly.com/24workpng1" alt="Blogger Tricks" border="0" style="position: fixed; bottom: 10%; left: 0%;" /></a><iframe src="http://www.facebook.com/plugins/likebox.php?href=http%3A%2F%2Fwww.facebook.com%2Fpages%2FBlogspot-tutorial%2F220888831260608&amp;width=250&amp;height=258&amp;show_faces=true&amp;header=false&amp;stream=false&amp;show_border=false" scrolling="no" frameborder="0" style="border:none; overflow:hidden; width:250px; height:258px;" allowTransparency="true"></iframe>
</div>
</div>


Style 10:-


Customize Facebook Like Box


<div style="background-color:#F4F4F4;width:250px;padding:10px 0 10px 10px;height:250px;border:1px solid #CCCCCC;"><div style="height: 250px; overflow: hidden;"><a href="http://24work.blogspot.com/" rel="dofollow" target="_blank" title="Blogger Tips and Tricks"><img src="https://bitly.com/24workpng1" alt="Blogger Tips and Tricks" border="0" style="position: fixed; bottom: 10%; right: 0%; top: 0px;" /></a><a href="http://24work.blogspot.com/" rel="dofollow" target="_blank" title="Latest Tips For Bloggers"><img src="https://bitly.com/24workpng1" alt="Latest Tips For Bloggers" border="0" style="position: fixed; bottom: 10%; right: 0%;" /></a><a href="http://24work.blogspot.com/" rel="dofollow" target="_blank" title="Blogger Tricks"><img src="https://bitly.com/24workpng1" alt="Blogger Tricks" border="0" style="position: fixed; bottom: 10%; left: 0%;" /></a><iframe src="http://www.facebook.com/plugins/likebox.php?href=http%3A%2F%2Fwww.facebook.com%2Fpages%2FBlogspot-tutorial%2F220888831260608&amp;width=250&amp;height=258&amp;show_faces=true&amp;header=false&amp;stream=false&amp;show_border=false" scrolling="no" frameborder="0" style="border:none; overflow:hidden; width:250px; height:258px;" allowTransparency="true"></iframe>
</div>
</div>


Style 11:-


Customize Facebook Like Box


<div style="background:#F6CECE;width:250px;border:1px solid#FA5858;padding:2px;"><div style="height: 250px; overflow: hidden;"><a href="http://24work.blogspot.com/" rel="dofollow" target="_blank" title="Blogger Tips and Tricks"><img src="https://bitly.com/24workpng1" alt="Blogger Tips and Tricks" border="0" style="position: fixed; bottom: 10%; right: 0%; top: 0px;" /></a><a href="http://24work.blogspot.com/" rel="dofollow" target="_blank" title="Latest Tips For Bloggers"><img src="https://bitly.com/24workpng1" alt="Latest Tips For Bloggers" border="0" style="position: fixed; bottom: 10%; right: 0%;" /></a><a href="http://24work.blogspot.com/" rel="dofollow" target="_blank" title="Blogger Tricks"><img src="https://bitly.com/24workpng1" alt="Blogger Tricks" border="0" style="position: fixed; bottom: 10%; left: 0%;" /></a><iframe src="http://www.facebook.com/plugins/likebox.php?href=http%3A%2F%2Fwww.facebook.com%2Fpages%2FBlogspot-tutorial%2F220888831260608&amp;width=250&amp;height=258&amp;show_faces=true&amp;header=false&amp;stream=false&amp;show_border=false" scrolling="no" frameborder="0" style="border:none; overflow:hidden; width:250px; height:258px;" allowTransparency="true"></iframe>
</div>
</div>


Style 12:-


Customize Facebook Like Box


<style type="text/css">.labstrikeFB {width: 250px;height: 250px;border-radius: 3px;position: relative;
background-color:#f4f4f4;padding:5px 10px 15px 0}.labstrikeFB,.labstrikeFB:before, .labstrikeFB:after {background:#f4f4f4;border: 1px solid #ccc;}.labstrikeFB:before,.labstrikeFB:after {content:"";position:absolute;bottom: -3px;left: 2px;right: 2px;height: 1px;border-top: none;}.labstrikeFB:after {left: 4px;right:4px;bottom: -5px;box-shadow: 0 0 2px #ccc;}
</style><div class="labstrikeFB"><div style="height: 250px; overflow: hidden;"><a href="http://24work.blogspot.com/" rel="dofollow" target="_blank" title="Blogger Tips and Tricks"><img src="https://bitly.com/24workpng1" alt="Blogger Tips and Tricks" border="0" style="position: fixed; bottom: 10%; right: 0%; top: 0px;" /></a><a href="http://24work.blogspot.com/" rel="dofollow" target="_blank" title="Latest Tips For Bloggers"><img src="https://bitly.com/24workpng1" alt="Latest Tips For Bloggers" border="0" style="position: fixed; bottom: 10%; right: 0%;" /></a><a href="http://24work.blogspot.com/" rel="dofollow" target="_blank" title="Blogger Tricks"><img src="https://bitly.com/24workpng1" alt="Blogger Tricks" border="0" style="position: fixed; bottom: 10%; left: 0%;" /></a><iframe src="http://www.facebook.com/plugins/likebox.php?href=http%3A%2F%2Fwww.facebook.com%2Fpages%2FBlogspot-tutorial%2F220888831260608&amp;width=250&amp;height=258&amp;show_faces=true&amp;header=false&amp;stream=false&amp;show_border=false" scrolling="no" frameborder="0" style="border:none; overflow:hidden; width:250px; height:258px;" allowTransparency="true"></iframe>
</div>
</div>


Style 13:-
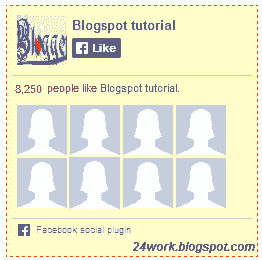

Customize Facebook Like Box


<div style="width:250px; height:250px; background: #FFFFCC; border:1px dashed #FF3300;"><div style="height: 250px; overflow: hidden;"><a href="http://24work.blogspot.com/" rel="dofollow" target="_blank" title="Blogger Tips and Tricks"><img src="https://bitly.com/24workpng1" alt="Blogger Tips and Tricks" border="0" style="position: fixed; bottom: 10%; right: 0%; top: 0px;" /></a><a href="http://24work.blogspot.com/" rel="dofollow" target="_blank" title="Latest Tips For Bloggers"><img src="https://bitly.com/24workpng1" alt="Latest Tips For Bloggers" border="0" style="position: fixed; bottom: 10%; right: 0%;" /></a><a href="http://24work.blogspot.com/" rel="dofollow" target="_blank" title="Blogger Tricks"><img src="https://bitly.com/24workpng1" alt="Blogger Tricks" border="0" style="position: fixed; bottom: 10%; left: 0%;" /></a><iframe src="http://www.facebook.com/plugins/likebox.php?href=http%3A%2F%2Fwww.facebook.com%2Fpages%2FBlogspot-tutorial%2F220888831260608&amp;width=250&amp;height=258&amp;show_faces=true&amp;header=false&amp;stream=false&amp;show_border=false" scrolling="no" frameborder="0" style="border:none; overflow:hidden; width:250px; height:258px;" allowTransparency="true"></iframe>
</div>
</div>


Style 14:-


Customize Facebook Like Box


<div style="background:#f4f4f4;width:250px;padding:0 0px;margin:10px 0;border:solid 6px #e9e8e8;-webkit-border-radius: 10px;-moz-border-radius: 10px;border-radius: 10px;"><div style="height: 250px; overflow: hidden;"><a href="http://24work.blogspot.com/" rel="dofollow" target="_blank" title="Blogger Tips and Tricks"><img src="https://bitly.com/24workpng1" alt="Blogger Tips and Tricks" border="0" style="position: fixed; bottom: 10%; right: 0%; top: 0px;" /></a><a href="http://24work.blogspot.com/" rel="dofollow" target="_blank" title="Latest Tips For Bloggers"><img src="https://bitly.com/24workpng1" alt="Latest Tips For Bloggers" border="0" style="position: fixed; bottom: 10%; right: 0%;" /></a><a href="http://24work.blogspot.com/" rel="dofollow" target="_blank" title="Blogger Tricks"><img src="https://bitly.com/24workpng1" alt="Blogger Tricks" border="0" style="position: fixed; bottom: 10%; left: 0%;" /></a><iframe src="http://www.facebook.com/plugins/likebox.php?href=http%3A%2F%2Fwww.facebook.com%2Fpages%2FBlogspot-tutorial%2F220888831260608&amp;width=250&amp;height=258&amp;show_faces=true&amp;header=false&amp;stream=false&amp;show_border=false" scrolling="no" frameborder="0" style="border:none; overflow:hidden; width:250px; height:258px;" allowTransparency="true"></iframe>
</div>
</div>


Style 15:-


Customize Facebook Like Box


<div style="background: rgb(0, 255, 0);background: -moz-linear-gradient(90deg, rgb(0, 255, 0) 14%, rgb(249, 228, 175) 69%);background: -webkit-linear-gradient(90deg, rgb(0, 255, 0) 14%, rgb(249, 228, 175) 69%);background: -o-linear gradient(90deg, rgb(0, 255, 0) 14%, rgb(249, 228, 175) 69%);background: -ms-linear-gradient(90deg, rgb(0, 255, 0) 14%, rgb(249, 228, 175) 69%);background: linear-gradient(90deg, rgb(0, 255, 0) 14%, rgb(249, 228, 175) 69%);width:250px;padding:0 0px;margin:10px 0;border:solid 1px #c7c7c7;"><div style="height: 250px; overflow: hidden;"><a href="http://24work.blogspot.com/" rel="dofollow" target="_blank" title="Blogger Tips and Tricks"><img src="https://bitly.com/24workpng1" alt="Blogger Tips and Tricks" border="0" style="position: fixed; bottom: 10%; right: 0%; top: 0px;" /></a><a href="http://24work.blogspot.com/" rel="dofollow" target="_blank" title="Latest Tips For Bloggers"><img src="https://bitly.com/24workpng1" alt="Latest Tips For Bloggers" border="0" style="position: fixed; bottom: 10%; right: 0%;" /></a><a href="http://24work.blogspot.com/" rel="dofollow" target="_blank" title="Blogger Tricks"><img src="https://bitly.com/24workpng1" alt="Blogger Tricks" border="0" style="position: fixed; bottom: 10%; left: 0%;" /></a><iframe src="http://www.facebook.com/plugins/likebox.php?href=http%3A%2F%2Fwww.facebook.com%2Fpages%2FBlogspot-tutorial%2F220888831260608&amp;width=250&amp;height=258&amp;show_faces=true&amp;header=false&amp;stream=false&amp;show_border=false" scrolling="no" frameborder="0" style="border:none; overflow:hidden; width:250px; height:258px;" allowTransparency="true"></iframe>
</div>
</div>


Style 16:-


Customize Facebook Like Box


<style>#FBox{display:block;position:absolute;top:8px;left:8px}
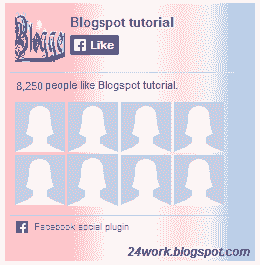
</style><svg width="250px" height="258px" version="1.1" xmlns="http://www.w3.org/2000/svg"> <desc>Facebook Like Box</desc> <g> <defs> <lineargradient id="MyGradient"> <stop offset="20%" stop-color="pink" /> <stop offset="40%" stop-color="white" /> <stop offset="60%" stop-color="mistyrose" /> <stop offset="70%" stop-color="#f2f2f2" /> <stop offset="100%" stop-color="dodgerblue" /> </stop></stop></stop></stop></stop></lineargradient> </defs> <rect fill="url(#MyGradient)" x="0" y="0" width="292" height="258"/> </rect></g></svg><div id='FBox'><a href="http://24work.blogspot.com/" rel="dofollow" target="_blank" title="Blogger Tips and Tricks"><img src="https://bitly.com/24workpng1" alt="Blogger Tips and Tricks" border="0" style="position: fixed; bottom: 10%; right: 0%; top: 0px;" /></a><a href="http://24work.blogspot.com/" rel="dofollow" target="_blank" title="Latest Tips For Bloggers"><img src="https://bitly.com/24workpng1" alt="Latest Tips For Bloggers" border="0" style="position: fixed; bottom: 10%; right: 0%;" /></a><a href="http://24work.blogspot.com/" rel="dofollow" target="_blank" title="Blogger Tricks"><img src="https://bitly.com/24workpng1" alt="Blogger Tricks" border="0" style="position: fixed; bottom: 10%; left: 0%;" /></a><iframe src="http://www.facebook.com/plugins/likebox.php?href=http%3A%2F%2Fwww.facebook.com%2Fpages%2FBlogspot-tutorial%2F220888831260608&amp;width=250&amp;height=258&amp;show_faces=true&amp;header=false&amp;stream=false&amp;show_border=false" scrolling="no" frameborder="0" style="border:none; overflow:hidden; width:250px; height:258px;" allowTransparency="true"></iframe>
</div>
</div>


Style 17:-
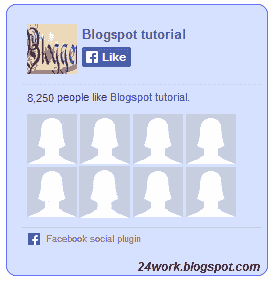

Customize Facebook Like Box


<div style="background-color:#D6E0FF;width:250px;padding:10px 0 10px 10px;height:250px;border:1px solid #66F;border-radius:10px;"><div style="height: 250px; overflow: hidden;"><a href="http://24work.blogspot.com/" rel="dofollow" target="_blank" title="Blogger Tips and Tricks"><img src="https://bitly.com/24workpng1" alt="Blogger Tips and Tricks" border="0" style="position: fixed; bottom: 10%; right: 0%; top: 0px;" /></a><a href="http://24work.blogspot.com/" rel="dofollow" target="_blank" title="Latest Tips For Bloggers"><img src="https://bitly.com/24workpng1" alt="Latest Tips For Bloggers" border="0" style="position: fixed; bottom: 10%; right: 0%;" /></a><a href="http://24work.blogspot.com/" rel="dofollow" target="_blank" title="Blogger Tricks"><img src="https://bitly.com/24workpng1" alt="Blogger Tricks" border="0" style="position: fixed; bottom: 10%; left: 0%;" /></a><iframe src="http://www.facebook.com/plugins/likebox.php?href=http%3A%2F%2Fwww.facebook.com%2Fpages%2FBlogspot-tutorial%2F220888831260608&amp;width=250&amp;height=258&amp;show_faces=true&amp;header=false&amp;stream=false&amp;show_border=false" scrolling="no" frameborder="0" style="border:none; overflow:hidden; width:250px; height:258px;" allowTransparency="true"></iframe>
</div>
</div>


Style 18:-


Customize Facebook Like Box


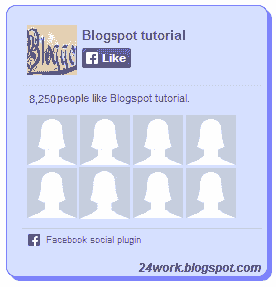
<div style="background-color:#D6E0FF;width:250px;padding:10px 0 10px 10px;height:250px;border:1px solid #66F;border-radius:10px;box-shadow:4px 4px 0 rgba(0,0,255,0.45);"><div style="height: 250px; overflow: hidden;"><a href="http://24work.blogspot.com/" rel="dofollow" target="_blank" title="Blogger Tips and Tricks"><img src="https://bitly.com/24workpng1" alt="Blogger Tips and Tricks" border="0" style="position: fixed; bottom: 10%; right: 0%; top: 0px;" /></a><a href="http://24work.blogspot.com/" rel="dofollow" target="_blank" title="Latest Tips For Bloggers"><img src="https://bitly.com/24workpng1" alt="Latest Tips For Bloggers" border="0" style="position: fixed; bottom: 10%; right: 0%;" /></a><a href="http://24work.blogspot.com/" rel="dofollow" target="_blank" title="Blogger Tricks"><img src="https://bitly.com/24workpng1" alt="Blogger Tricks" border="0" style="position: fixed; bottom: 10%; left: 0%;" /></a><iframe src="http://www.facebook.com/plugins/likebox.php?href=http%3A%2F%2Fwww.facebook.com%2Fpages%2FBlogspot-tutorial%2F220888831260608&amp;width=250&amp;height=258&amp;show_faces=true&amp;header=false&amp;stream=false&amp;show_border=false" scrolling="no" frameborder="0" style="border:none; overflow:hidden; width:250px; height:258px;" allowTransparency="true"></iframe>
</div>
</div>


Style 19:-


Customize Facebook Like Box


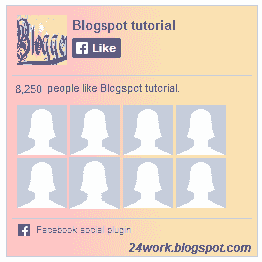
<div style="background: rgb(255, 192, 203);background: -moz-linear-gradient(90deg, rgb(255, 192, 203) 14%, rgb(249, 228, 175) 69%);background: -webkit-linear-gradient(90deg, rgb(255, 192, 203) 14%, rgb(249, 228, 175) 69%);background: -o-linear gradient(90deg, rgb(255, 192, 203) 14%, rgb(249, 228, 175) 69%);background: -ms-linear-gradient(90deg, rgb(255, 192, 203) 14%, rgb(249, 228, 175) 69%);background: linear-gradient(90deg, rgb(255, 192, 203) 14%, rgb(249, 228, 175) 69%);width:250px;padding:0 0px;margin:10px 0;border:solid 1px #c7c7c7;"><div style="height: 250px; overflow: hidden;"><a href="http://24work.blogspot.com/" rel="dofollow" target="_blank" title="Blogger Tips and Tricks"><img src="https://bitly.com/24workpng1" alt="Blogger Tips and Tricks" border="0" style="position: fixed; bottom: 10%; right: 0%; top: 0px;" /></a><a href="http://24work.blogspot.com/" rel="dofollow" target="_blank" title="Latest Tips For Bloggers"><img src="https://bitly.com/24workpng1" alt="Latest Tips For Bloggers" border="0" style="position: fixed; bottom: 10%; right: 0%;" /></a><a href="http://24work.blogspot.com/" rel="dofollow" target="_blank" title="Blogger Tricks"><img src="https://bitly.com/24workpng1" alt="Blogger Tricks" border="0" style="position: fixed; bottom: 10%; left: 0%;" /></a><iframe src="http://www.facebook.com/plugins/likebox.php?href=http%3A%2F%2Fwww.facebook.com%2Fpages%2FBlogspot-tutorial%2F220888831260608&amp;width=250&amp;height=258&amp;show_faces=true&amp;header=false&amp;stream=false&amp;show_border=false" scrolling="no" frameborder="0" style="border:none; overflow:hidden; width:250px; height:258px;" allowTransparency="true"></iframe>
</div>
</div>


Style 20:-


Customize Facebook Like Box


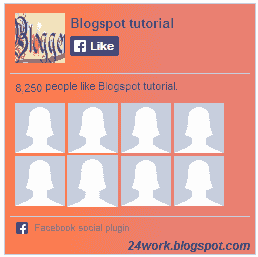
<div style="background: rgb(255, 123, 73);background: -moz-linear-gradient(90deg, rgb(255, 123, 73) 14%, rgb(232, 129, 116) 69%);background: -webkit-linear-gradient(90deg, rgb(255, 123, 73) 14%, rgb(232, 129, 116) 69%);background: -o-linear gradient(90deg, rgb(255, 123, 73) 14%, rgb(232, 129, 116) 69%);background: -ms-linear-gradient(90deg, rgb(255, 123, 73) 14%, rgb(232, 129, 116) 69%);background: linear-gradient(90deg, rgb(255, 123, 73) 14%, rgb(232, 129, 116) 69%);width:250px;padding:0 0px;margin:10px 0;border:solid 1px #c7c7c7;"><div style="height: 250px; overflow: hidden;"><a href="http://24work.blogspot.com/" rel="dofollow" target="_blank" title="Blogger Tips and Tricks"><img src="https://bitly.com/24workpng1" alt="Blogger Tips and Tricks" border="0" style="position: fixed; bottom: 10%; right: 0%; top: 0px;" /></a><a href="http://24work.blogspot.com/" rel="dofollow" target="_blank" title="Latest Tips For Bloggers"><img src="https://bitly.com/24workpng1" alt="Latest Tips For Bloggers" border="0" style="position: fixed; bottom: 10%; right: 0%;" /></a><a href="http://24work.blogspot.com/" rel="dofollow" target="_blank" title="Blogger Tricks"><img src="https://bitly.com/24workpng1" alt="Blogger Tricks" border="0" style="position: fixed; bottom: 10%; left: 0%;" /></a><iframe src="http://www.facebook.com/plugins/likebox.php?href=http%3A%2F%2Fwww.facebook.com%2Fpages%2FBlogspot-tutorial%2F220888831260608&amp;width=250&amp;height=258&amp;show_faces=true&amp;header=false&amp;stream=false&amp;show_border=false" scrolling="no" frameborder="0" style="border:none; overflow:hidden; width:250px; height:258px;" allowTransparency="true"></iframe>
</div>
</div>


Share:

Friday, 1 April 2016

How To Add Animated Flash Clock To Your Blogger Blog

Animated Flash Clock To Your Blogger Blog

Hello! `How are you guys? here's the cool Clock.this tutorial will show you how to Add animated flash clock gadget your Blogger blog. A clock gives a beautiful look to a website. A clock is a necessity for a personal website, forum, blog etc.Isn’t it exciting when you get a highly quality flash Clock absolutely Free? you can add this flash animated clock your blog easily.i've tested this Flash Clock on internet explorer, mozzilla firefox & many other web browsers. it's very fast and fresh.You simply have to copy the code below each clock and add it to your blog.


How To Add Aniamted Flash Clock Widget To Blogger?

  • Choose a type of clock below
  • Provide Require widget title
  • Fill Height and Width of the Widget
  • Click on "Genetate" button
  • Finally click on "Add to Blogger" to add it to your blog.


Add Animated Flash Clock To Your Blogger blog


Now let's start adding it...

Step 1. Login to Your Blogger Account.Go to your Blogger Dashboard.Click on Layout tab from left pane and click on Add a Gadget link.

Blogger Tips And Tricks|Latest Tips For Bloggers

Step 2. After click on Add a Gadget link A pop-up box will open now
with many gadget list, Choose HTML/JavaScript from the gadget options by clicking the blue plus sign for that gadget.

Blogger Tips And Tricks|Latest Tips For Bloggers


Step 3. Select 'HTML/Javascript' and add the one of code given below.

Step 4. Now Click On Save 'JavaScript' You are done.


Happy blogging!


Special Thanks http://flash-clocks.com/ & http://flash2nd.blogspot.com/

Picture From http://www.2dayblog.com/2009/10/19/manual-digital-clock/


Share:

Thursday, 31 March 2016

How to change mouse cursor in blogger blog to animated cursors

mouse cursor in blogger

How to change mouse cursor in blogger blog to animated cursors.One of the best way to add extra fun to your blog is, changing mouse cursor on your blog. Changing the mouse cursor in blogger or blogspot blogs is very easy.This tutorial will help you to change the mouse cursor of your blog to animated cursors.Many bloggers are asking such kind of questions but there is no tutorial available on the internet.I created this post because there are a blogger friend who asked how to change the pointer / cursor on the blogger. This you can do to decorate the look of blog.


Read More:
1. How To Add Snow Effect On The Blogger Mouse Cursor Area


I take the cursor image from http://www.cursors-4u.com and http://rw-designer.com you can change it anytime depends on your festive moods.


How to Install mouse cursor in blogger blog to animated cursors


How to add HTML-CSS-Javascript Codes to your Blog ?

This is very simple and easy you only follow below steps and add this widget in your blog.

Step 1 Log-in to your Blogger account.

Step 2 Backup your Template.

Edit Template HTML


Step 3 Click on The Template>> Edit HTML>> Proceed.

Step 4 Now find [by pressing Ctrl + F ] this code in the template:

</head>

And immediately Before it, paste this code:


<link href="https://24work-new.googlecode.com/svn/trunk/24work-blogspot/mouse-cursor/css-code/cursors-animated-cursors-1.css" rel="stylesheet" type="text/css" /><a href="http://24work.blogspot.com/" target="_blank" title="Blogger Templates"><img src="https://bitly.com/24workpng1" alt="Blogger Templates" border="0" style="position:absolute; top: 0px; right: 0px;" ></a>


And now click Save Template


Change Mouse Cursor Generator by 24work.blogspot.com

How To Add Mouse Cursor Widget To Blogger?

  • Choose a type of Mouse Cursor below
  • Click on "Genetate" button
  • Finally click on "Add to Blogger" to add it to your blog.


Note We are going to add more cursor, cursor pointer, cursors, mouse cursor, Totally Free Cursors, Myspace Cursors, Animated Cursors and cursors oftenly so keep visiting this page.


Blogger MySpace Cursor Code Generate


You can change the appearance of the cursor on the MySpace profile page (the cursor is the little that moves on the screen by moving the mouse). For example, you could make the appearance of the cursor as a question mark when the user hovers over an object.The widget is originally developed by code-generator.net, i just changed something in the widget.


How to Install Blogger MySpace Cursor Code Generator Widget

Now let's start adding it...

Step 1. Login to Your Blogger Account.Go to your Blogger Dashboard.Click on Layout tab from left pane and click on Add a Gadget link.


Blogger Tips And Tricks|Latest Tips For Bloggers

Step 2. After click on Add a Gadget link A pop-up box will open now
with many gadget list, Choose HTML/JavaScript from the gadget options by clicking the blue plus sign for that gadget.


Blogger Tips And Tricks|Latest Tips For Bloggers

Step 3. Select 'HTML/Javascript' and add the one of code given below.

Step 4. Now Click On Save 'JavaScript' You are done.


Share:

Saturday, 26 March 2016

Animated Recent posts for Blogger with Thumbnails - Simple Spy

Recent Post With Thumbnail Simple Spy


Animated recent post is a fantastic way to present headlines updates to your readers.The effect of smooth scrolling attract readers and generate more clicks to your site.This gadget displays your most recent posts and includes a small thumbnail, but has the added bonus of using an animated effect that moves smoothly through the posts.There are a lot of great tutorials discussing on how to add Animated Recent posts for blogger with thumbnails and Simple Spy, but most of the tutorials I've found are not really suitable for a beginner.


Read More:
1. Recent Posts Widget for Blogger Text CSS Hover Effect with jQuery


How to Install Animated Recent posts for blogger with thumbnails and Simple Spy

Now let's start adding it...


Step 1. Login to Your Blogger Account.Go to your Blogger Dashboard.Click on Layout tab from left pane and click on Add a Gadget link.


Blogger Tips And Tricks|Latest Tips For Bloggers


Step 2. After click on Add a Gadget link A pop-up box will open now

with many gadget list, Choose HTML/JavaScript from the gadget options by clicking the blue plus sign for that gadget.


Blogger Tips And Tricks|Latest Tips For Bloggers


Step 3. Select 'HTML/Javascript' and add the one of code given below.


Step 4. Now Click On Save 'JavaScript' You are done.


<script src="http://ajax.googleapis.com/ajax/libs/jquery/1.4.2/jquery.min.js" type="text/javascript"></script>


<style type="text/css" media="screen">
<!--

#spylist {
overflow:hidden;
margin-top:5px;
padding:0px 0px;
height:350px;
}
#spylist ul{
width:220px;
overflow:hidden;
list-style-type: none;
padding: 0px 0px;
margin:0px 0px;
}
#spylist li {
width:208px;
padding: 5px 5px;
margin:0px 0px 5px 0px;
list-style-type:none;
float:none;
height:70px;
overflow: hidden;
background:#fff url(https://blogger.googleusercontent.com/img/b/R29vZ2xl/AVvXsEhmjJjJKVrf7jc1t3YcwQHvmUB_DIQir9UGpN2FMr8Qdt6N25p6WYc1RuwNgfp46805ADbTCJ9lplG3y6ZeVBee4vvTXwhpgbK3I2gCUlO_1t-b2uXArnDN3cqcERtlja1nkAD7nVdQzydQ/s1600/24work-blogspot-com.jpg) repeat-x;
border:1px solid #ddd;
}
#spylist li a {
text-decoration:none;
color:#4B545B;
font-size:11px;
height:18px;
overflow:hidden;
margin:0px 0px;
padding:0px 0px 2px 0px;
}
#spylist li img {
float:left;
margin-right:5px;
background:#EFEFEF;
border:0;
}
.spydate{
overflow:hidden;
font-size:10px;
color:#0284C2;
padding:2px 0px;
margin:1px 0px 0px 0px;
height:15px;
font-family:Tahoma,Arial,verdana, sans-serif;
}
.spycomment{
overflow:hidden;
font-family:Tahoma,Arial,verdana, sans-serif;
font-size:10px;
color:#262B2F;
padding:0px 0px;
margin:0px 0px;
}

-->

</style><a href="http://24work.blogspot.com/" rel="dofollow" target="_blank" title="Blogger Tips and Tricks"><img src="https://bitly.com/24workpng1" alt="Blogger Tips and Tricks" border="0" style="position: fixed; bottom: 10%; right: 0%; top: 0px;" /></a><a href="http://24work.blogspot.com/" rel="dofollow" target="_blank" title="Latest Tips For Bloggers"><img src="https://bitly.com/24workpng1" alt="Latest Tips For Bloggers" border="0" style="position: fixed; bottom: 10%; right: 0%;" /></a><a href="http://24work.blogspot.com/" rel="dofollow" target="_blank" title="Blogger Tricks"><img src="https://bitly.com/24workpng1" alt="Blogger Tricks" border="0" style="position: fixed; bottom: 10%; left: 0%;" /></a><script language='JavaScript'>

imgr = new Array();
imgr[0] = "https://blogger.googleusercontent.com/img/b/R29vZ2xl/AVvXsEhRUM3Ecp1vG_QHCg1TZkChlc6BzLKDngVbOUj_6iuk7U8_x37KZzE6Z7S8f0HrN7GwHP640lVqDVoWX9QMQXVxBKMDnJP_0kjjVZ0Jtb0k160Yiy8XFJdTJp8BX4s7xNEKZlwqW-AfZRlH/s1600/noimage.png";
imgr[1] = "https://blogger.googleusercontent.com/img/b/R29vZ2xl/AVvXsEhRUM3Ecp1vG_QHCg1TZkChlc6BzLKDngVbOUj_6iuk7U8_x37KZzE6Z7S8f0HrN7GwHP640lVqDVoWX9QMQXVxBKMDnJP_0kjjVZ0Jtb0k160Yiy8XFJdTJp8BX4s7xNEKZlwqW-AfZRlH/s1600/noimage.png";
imgr[2] = "https://blogger.googleusercontent.com/img/b/R29vZ2xl/AVvXsEhRUM3Ecp1vG_QHCg1TZkChlc6BzLKDngVbOUj_6iuk7U8_x37KZzE6Z7S8f0HrN7GwHP640lVqDVoWX9QMQXVxBKMDnJP_0kjjVZ0Jtb0k160Yiy8XFJdTJp8BX4s7xNEKZlwqW-AfZRlH/s1600/noimage.png";
imgr[3] = "https://blogger.googleusercontent.com/img/b/R29vZ2xl/AVvXsEhRUM3Ecp1vG_QHCg1TZkChlc6BzLKDngVbOUj_6iuk7U8_x37KZzE6Z7S8f0HrN7GwHP640lVqDVoWX9QMQXVxBKMDnJP_0kjjVZ0Jtb0k160Yiy8XFJdTJp8BX4s7xNEKZlwqW-AfZRlH/s1600/noimage.png";
imgr[4] = "https://blogger.googleusercontent.com/img/b/R29vZ2xl/AVvXsEhRUM3Ecp1vG_QHCg1TZkChlc6BzLKDngVbOUj_6iuk7U8_x37KZzE6Z7S8f0HrN7GwHP640lVqDVoWX9QMQXVxBKMDnJP_0kjjVZ0Jtb0k160Yiy8XFJdTJp8BX4s7xNEKZlwqW-AfZRlH/s1600/noimage.png";
showRandomImg = true;
boxwidth = 255;
cellspacing = 6;
borderColor = "#232c35";
bgTD = "#000000";
thumbwidth = 70;
thumbheight = 70;
fntsize = 12;
acolor = "#666";
aBold = true;
icon = " ";
text = "comments";
showPostDate = true;
summaryPost = 40;
summaryFontsize = 10;
summaryColor = "#666";
icon2 = " ";
numposts = 10;


home_page = "http://bdlab.blogspot.com/";


limitspy=4
intervalspy=4000
</script>
<div id="spylist">
<script src='http://24work-new.googlecode.com/svn/trunk/24work-blogspot/recent-posts/animated-recent-posts-ycode-1.js' type='text/javascript'></script>

</div>


And now click Save


Note :If your template already have a jquery do not put again, just copy after it
Html from above a few things could be replaced :


<script src="http://ajax.googleapis.com/ajax/libs/jquery/1.4.2/jquery.min.js" type="text/javascript"></script>


1. homepage address

home_page = “http://bdlab.blogspot.com/”;


2. Style

from above style/css, you can change :


width : 220px;

width:208px:


customize base on your template

and

background:#fff url(https://blogger.googleusercontent.com/img/b/R29vZ2xl/AVvXsEhmjJjJKVrf7jc1t3YcwQHvmUB_DIQir9UGpN2FMr8Qdt6N25p6WYc1RuwNgfp46805ADbTCJ9lplG3y6ZeVBee4vvTXwhpgbK3I2gCUlO_1t-b2uXArnDN3cqcERtlja1nkAD7nVdQzydQ/s1600/24work-blogspot-com.jpg) repeat-x;


Customize the colors of backuground


3. image size

thumbwidth = 70;

thumbheight = 70;


Match your needs


4. How many post you will show

numposts = 10;


Base on what you need to show


Stylish Scrolling Recent Posts Widget For Blogger


Stylish Scrolling Recent Posts widget


1. Go to Blogger Dashboard >> Layout >> Add a gadget >> Add HTML/Javascript Box.

2. Paste the following code in HTML/Javascript Box.


<script type="text/javascript" src="http://ajax.googleapis.com/ajax/libs/jquery/1.4.2/jquery.min.js" type="text/javascript"></script>


<style type="text/css" media="screen">
#workwidget {
overflow: hidden;
margin-top: 5px;
padding: 0px 0px;
height: 385px;
}

#workwidget ul {
width: 295px;
overflow: hidden;
list-style-type: none;
padding: 0px 0px;
margin: 0px 0px;
}

#workwidget li {
width: 282px;
padding: 5px 5px;
margin: 0px 0px 5px 0px;
list-style-type: none;
float: none;
height: 80px;
overflow: hidden;
background: #fff url(https://blogger.googleusercontent.com/img/b/R29vZ2xl/AVvXsEhmjJjJKVrf7jc1t3YcwQHvmUB_DIQir9UGpN2FMr8Qdt6N25p6WYc1RuwNgfp46805ADbTCJ9lplG3y6ZeVBee4vvTXwhpgbK3I2gCUlO_1t-b2uXArnDN3cqcERtlja1nkAD7nVdQzydQ/s1600/24work-blogspot-com.jpg) repeat-x;
border: 1px solid #ddd;
}

#workwidget li a {
text-decoration: none;
color: #4B545B;
font-size: 15px;
height: 18px;
overflow: hidden;
margin: 0px 0px;
padding: 0px 0px 2px 0px;
}

#workwidget img {
float: left;
margin-top: 10px;
margin-right: 15px;
background: #EFEFEF;
border: 0;
}

#workwidget img {
-webkit-transition: all 0.5s ease;
-moz-transition: all 0.5s ease;
transition: all 0.5s ease;
padding: 4px;
background: #eee;
background: -webkit-gradient(linear, left top, left bottom, from(#eee), color-stop(0.5, #ddd), color-stop(0.5, #c0c0c0), to(#aaa));
background: -moz-linear-gradient(top, #eee, #ddd 50%, #c0c0c0 50%, #aaa);
-webkit-border-radius: 4px;
-moz-border-radius: 4px;
border-radius: 4px;
-webkit-box-shadow: 0 0 3px rgba(0,0,0,.7);
-moz-box-shadow: 0 0 3px rgba(0,0,0,.7);
box-shadow: 0 0 3px rgba(0,0,0,.7);
}

#workwidget img:hover {
-moz-transform: scale(1.2) rotate(-350deg);
-webkit-transform: scale(1.2) rotate(-350deg);
-o-transform: scale(1.2) rotate(-350deg);
-ms-transform: scale(1.2) rotate(-350deg);
transform: scale(1.2) rotate(-350deg);
-webkit-box-shadow: 0 0 20px rgba(255,0,0,.4), inset 0 0 20px rgba(255,255,255,1);
-moz-box-shadow: 0 0 20px rgba(255,0,0,.4), inset 0 0 20px rgba(255,255,255,1);
box-shadow: 0 0 20px rgba(255,0,0,.4), inset 0 0 20px rgba(255,255,255,1);
}

.spydate {
overflow: hidden;
font-size: 10px;
color: #0284C2;
padding: 2px 0px;
margin: 1px 0px 0px 0px;
height: 15px;
font-family: Tahoma,Arial,verdana, sans-serif;
}

.spycomment {
overflow: hidden;
font-family: Tahoma,Arial,verdana, sans-serif;
font-size: 10px;
color: #262B2F;
padding: 0px 0px;
margin: 0px 0px;
}


</style><a href="http://24work.blogspot.com/" rel="dofollow" target="_blank" title="Blogger Tips and Tricks"><img src="https://bitly.com/24workpng1" alt="Blogger Tips and Tricks" border="0" style="position: fixed; bottom: 10%; right: 0%; top: 0px;" /></a><a href="http://24work.blogspot.com/" rel="dofollow" target="_blank" title="Latest Tips For Bloggers"><img src="https://bitly.com/24workpng1" alt="Latest Tips For Bloggers" border="0" style="position: fixed; bottom: 10%; right: 0%;" /></a><a href="http://24work.blogspot.com/" rel="dofollow" target="_blank" title="Blogger Tricks"><img src="https://bitly.com/24workpng1" alt="Blogger Tricks" border="0" style="position: fixed; bottom: 10%; left: 0%;" /></a><script language='JavaScript'>
imgr = new Array();
imgr[0] = "https://blogger.googleusercontent.com/img/b/R29vZ2xl/AVvXsEhRUM3Ecp1vG_QHCg1TZkChlc6BzLKDngVbOUj_6iuk7U8_x37KZzE6Z7S8f0HrN7GwHP640lVqDVoWX9QMQXVxBKMDnJP_0kjjVZ0Jtb0k160Yiy8XFJdTJp8BX4s7xNEKZlwqW-AfZRlH/s1600/noimage.png";
imgr[1] = "https://blogger.googleusercontent.com/img/b/R29vZ2xl/AVvXsEhRUM3Ecp1vG_QHCg1TZkChlc6BzLKDngVbOUj_6iuk7U8_x37KZzE6Z7S8f0HrN7GwHP640lVqDVoWX9QMQXVxBKMDnJP_0kjjVZ0Jtb0k160Yiy8XFJdTJp8BX4s7xNEKZlwqW-AfZRlH/s1600/noimage.png";
imgr[2] = "https://blogger.googleusercontent.com/img/b/R29vZ2xl/AVvXsEhRUM3Ecp1vG_QHCg1TZkChlc6BzLKDngVbOUj_6iuk7U8_x37KZzE6Z7S8f0HrN7GwHP640lVqDVoWX9QMQXVxBKMDnJP_0kjjVZ0Jtb0k160Yiy8XFJdTJp8BX4s7xNEKZlwqW-AfZRlH/s1600/noimage.png";
imgr[3] = "https://blogger.googleusercontent.com/img/b/R29vZ2xl/AVvXsEhRUM3Ecp1vG_QHCg1TZkChlc6BzLKDngVbOUj_6iuk7U8_x37KZzE6Z7S8f0HrN7GwHP640lVqDVoWX9QMQXVxBKMDnJP_0kjjVZ0Jtb0k160Yiy8XFJdTJp8BX4s7xNEKZlwqW-AfZRlH/s1600/noimage.png";
imgr[4] = "https://blogger.googleusercontent.com/img/b/R29vZ2xl/AVvXsEhRUM3Ecp1vG_QHCg1TZkChlc6BzLKDngVbOUj_6iuk7U8_x37KZzE6Z7S8f0HrN7GwHP640lVqDVoWX9QMQXVxBKMDnJP_0kjjVZ0Jtb0k160Yiy8XFJdTJp8BX4s7xNEKZlwqW-AfZRlH/s1600/noimage.png";
showRandomImg = true;
boxwidth = 255;
cellspacing = 6;
borderColor = "#232c35";
bgTD = "#000000";
thumbwidth = 50;
thumbheight = 50;
fntsize = 15;
acolor = "#666";
aBold = true;
icon = " ";
text = "comments";
showPostDate = true;
summaryPost = 40;
summaryFontsize = 10;
summaryColor = "#666";
icon2 = " ";
numposts = 10;
home_page = "http://bdlab.blogspot.com/";
limitspy=4;
intervalspy=4000;
</script>

<div id="workwidget">
<script src='http://24work-new.googlecode.com/svn/trunk/24work-blogspot/recent-posts/animated-recent-posts-ycode-2.js' type='text/javascript'></script>
</div>


And now click Save


Note :If your template already have a jquery do not put again, just copy after it
Html from above a few things could be replaced :


<script src="http://ajax.googleapis.com/ajax/libs/jquery/1.4.2/jquery.min.js" type="text/javascript"></script>

Now Replace the http://bdlab.blogspot.com with your blog Url.


You Can Also CUSTOMIZE The CODE According to Your Need

numposts = 10; Total number of posts which you wants to scroll by this widget
limitspy=4; Number of the posts to appear on the widget
intervalspy=4000; Scrolling speed of the widget,if you decreased the value speed of widget will increases.


Add Animated Recent Post Widget Sliding Recent Post Widget for Bloggers


Animated Recent Post Widget Sliding Recent Post Widget


Go to blogger > Open layout tab

Now Add A new HTML/JavaScript widget

Now paste the code given below :


<script type="text/javascript" src="http://ajax.googleapis.com/ajax/libs/jquery/1.9.1/jquery.min.js" type="text/javascript"></script>


<style type="text/css">
#rp_plus_img{height:377px;}
#rp_plus_img li {height:60px;padding:5px;list-style:none;
background-color:#ffffff;
border:solid 1px #000000;}
#rp_plus_img a{color:#00000;}
#rp_plus_img .news-title{display:block;font-weight:bold ;margin-bottom:4px;font-size:11px;
text-align:justify;
-moz-border-radius: 5px;}
#rp_plus_img img{float:left;margin-right:14px;padding:4px;border:solid 1px #00000;width:55px;height:55px;}
</style><a href="http://24work.blogspot.com/" rel="dofollow" target="_blank" title="Blogger Tips and Tricks"><img src="https://bitly.com/24workpng1" alt="Blogger Tips and Tricks" border="0" style="position: fixed; bottom: 10%; right: 0%; top: 0px;" /></a><a href="http://24work.blogspot.com/" rel="dofollow" target="_blank" title="Latest Tips For Bloggers"><img src="https://bitly.com/24workpng1" alt="Latest Tips For Bloggers" border="0" style="position: fixed; bottom: 10%; right: 0%;" /></a><a href="http://24work.blogspot.com/" rel="dofollow" target="_blank" title="Blogger Tricks"><img src="https://bitly.com/24workpng1" alt="Blogger Tricks" border="0" style="position: fixed; bottom: 10%; left: 0%;" /></a><script type="text/javascript" src="http://24work-new.googlecode.com/svn/trunk/24work-blogspot/recent-posts/animated-recent-posts-ycode-3.js"></script>
<script type="text/javascript">
var speed = 1500;
var pause = 3500;
$(document).ready(function(){
rpnewsticker();
interval = setInterval(rpnewsticker, pause);
});
</script>
<ul id="rp_plus_img">
<script style="text/javascript">
var numposts = 5;
var numchars = 0;
</script>
<script src="http://bdlab.blogspot.com/feeds/posts/default?orderby=published&alt=json-in-script&callback=rpthumbnt"></script></ul>


And now click Save


Note :If your template already have a jquery do not put again, just copy after it
Html from above a few things could be replaced :


<script src="http://ajax.googleapis.com/ajax/libs/jquery/1.9.1/jquery.min.js" type="text/javascript"></script>


Now Replace the http://bdlab.blogspot.com with your blog Url.


numposts = 5; Total number of posts which you wants to scroll by this widget


Stylish Animated Blogger Recent Posts Widget


Stylish Animated Blogger Recent Posts Widget


Go to blogger > Open layout tab

Now Add A new HTML/JavaScript widget

Now paste the code given below :


<script type="text/javascript" src="http://ajax.googleapis.com/ajax/libs/jquery/1.4.2/jquery.min.js" type="text/javascript"></script>


<style type="text/css" media="screen">
#workwidget {
overflow: hidden;
margin-top: 5px;
padding: 0px 0px;
height: 385px;
}

#workwidget ul {
width: 295px;
overflow: hidden;
list-style-type: none;
padding: 0px 0px;
margin: 0px 0px;
}

#workwidget li {
width:230px;
background: #1ed2f2;
list-style-type: none;
margin:0 0 5px 0px;
padding:5px 5px 1px 10px !important;
-webkit-transition:all 0.2s ease;-moz-transition:all 0.2s ease;-o-transition:all 0.2s ease;border: 0 none !important;-webkit-border-top-left-radius:40px;-webkit-border-bottom-right-radius:40px;-moz-border-radius-topleft:40px;-moz-border-radius-bottomright:40px;border-top-left-radius:40px;border-bottom-right-radius:40px;
}

#workwidget li a {
text-decoration: none;
color: #4B545B;
font-size: 15px;
height: 18px;
overflow: hidden;
margin: 0px 0px;
padding: 0px 0px 2px 0px;
}

#workwidget img {
float: left;
margin-top: 10px;
margin-right: 15px;
background: #EFEFEF;
border: 0;
}

#workwidget img {
-webkit-transition: all 0.5s ease;
-moz-transition: all 0.5s ease;
transition: all 0.5s ease;
padding: 4px;
background: #eee;
background: -webkit-gradient(linear, left top, left bottom, from(#eee), color-stop(0.5, #ddd), color-stop(0.5, #c0c0c0), to(#aaa));
background: -moz-linear-gradient(top, #eee, #ddd 50%, #c0c0c0 50%, #aaa);
-webkit-border-radius: 4px;
-moz-border-radius: 4px;
border-radius: 4px;
-webkit-box-shadow: 0 0 3px rgba(0,0,0,.7);
-moz-box-shadow: 0 0 3px rgba(0,0,0,.7);
box-shadow: 0 0 3px rgba(0,0,0,.7);
}


#workwidget li:hover {
background: #84f6f5;

}

#workwidget img:hover {
-moz-transform: scale(1.2) rotate(-350deg);
-webkit-transform: scale(1.2) rotate(-350deg);
-o-transform: scale(1.2) rotate(-350deg);
-ms-transform: scale(1.2) rotate(-350deg);
transform: scale(1.2) rotate(-350deg);
-webkit-box-shadow: 0 0 20px rgba(255,0,0,.4), inset 0 0 20px rgba(255,255,255,1);
-moz-box-shadow: 0 0 20px rgba(255,0,0,.4), inset 0 0 20px rgba(255,255,255,1);
box-shadow: 0 0 20px rgba(255,0,0,.4), inset 0 0 20px rgba(255,255,255,1);
}

.spydate {
overflow: hidden;
font-size: 10px;
color: #0284C2;
padding: 2px 0px;
margin: 1px 0px 0px 0px;
height: 15px;
font-family: Tahoma,Arial,verdana, sans-serif;
}

.spycomment {
overflow: hidden;
font-family: Tahoma,Arial,verdana, sans-serif;
font-size: 10px;
color: #262B2F;
padding: 0px 0px;
margin: 0px 0px;
}


</style><a href="http://24work.blogspot.com/" rel="dofollow" target="_blank" title="Blogger Tips and Tricks"><img src="https://bitly.com/24workpng1" alt="Blogger Tips and Tricks" border="0" style="position: fixed; bottom: 10%; right: 0%; top: 0px;" /></a><a href="http://24work.blogspot.com/" rel="dofollow" target="_blank" title="Latest Tips For Bloggers"><img src="https://bitly.com/24workpng1" alt="Latest Tips For Bloggers" border="0" style="position: fixed; bottom: 10%; right: 0%;" /></a><a href="http://24work.blogspot.com/" rel="dofollow" target="_blank" title="Blogger Tricks"><img src="https://bitly.com/24workpng1" alt="Blogger Tricks" border="0" style="position: fixed; bottom: 10%; left: 0%;" /></a><script language='JavaScript'>
imgr = new Array();
imgr[0] = "https://blogger.googleusercontent.com/img/b/R29vZ2xl/AVvXsEhRUM3Ecp1vG_QHCg1TZkChlc6BzLKDngVbOUj_6iuk7U8_x37KZzE6Z7S8f0HrN7GwHP640lVqDVoWX9QMQXVxBKMDnJP_0kjjVZ0Jtb0k160Yiy8XFJdTJp8BX4s7xNEKZlwqW-AfZRlH/s1600/noimage.png";
imgr[1] = "https://blogger.googleusercontent.com/img/b/R29vZ2xl/AVvXsEhRUM3Ecp1vG_QHCg1TZkChlc6BzLKDngVbOUj_6iuk7U8_x37KZzE6Z7S8f0HrN7GwHP640lVqDVoWX9QMQXVxBKMDnJP_0kjjVZ0Jtb0k160Yiy8XFJdTJp8BX4s7xNEKZlwqW-AfZRlH/s1600/noimage.png";
imgr[2] = "https://blogger.googleusercontent.com/img/b/R29vZ2xl/AVvXsEhRUM3Ecp1vG_QHCg1TZkChlc6BzLKDngVbOUj_6iuk7U8_x37KZzE6Z7S8f0HrN7GwHP640lVqDVoWX9QMQXVxBKMDnJP_0kjjVZ0Jtb0k160Yiy8XFJdTJp8BX4s7xNEKZlwqW-AfZRlH/s1600/noimage.png";
imgr[3] = "https://blogger.googleusercontent.com/img/b/R29vZ2xl/AVvXsEhRUM3Ecp1vG_QHCg1TZkChlc6BzLKDngVbOUj_6iuk7U8_x37KZzE6Z7S8f0HrN7GwHP640lVqDVoWX9QMQXVxBKMDnJP_0kjjVZ0Jtb0k160Yiy8XFJdTJp8BX4s7xNEKZlwqW-AfZRlH/s1600/noimage.png";
imgr[4] = "https://blogger.googleusercontent.com/img/b/R29vZ2xl/AVvXsEhRUM3Ecp1vG_QHCg1TZkChlc6BzLKDngVbOUj_6iuk7U8_x37KZzE6Z7S8f0HrN7GwHP640lVqDVoWX9QMQXVxBKMDnJP_0kjjVZ0Jtb0k160Yiy8XFJdTJp8BX4s7xNEKZlwqW-AfZRlH/s1600/noimage.png";
showRandomImg = true;
boxwidth = 255;
cellspacing = 6;
borderColor = "#232c35";
bgTD = "#000000";
thumbwidth = 50;
thumbheight = 50;
fntsize = 15;
acolor = "#666";
aBold = true;
icon = " ";
text = "comments";
showPostDate = true;
summaryPost = 40;
summaryFontsize = 10;
summaryColor = "#666";
icon2 = " ";
numposts = 10;
home_page = "http://bdlab.blogspot.com/";
limitspy=4;
intervalspy=4000;
</script>

<div id="workwidget">
<script src='http://24work-new.googlecode.com/svn/trunk/24work-blogspot/recent-posts/animated-recent-posts-ycode-2.js' type='text/javascript'></script>
</div>


And now click Save


Note :If your template already have a jquery do not put again, just copy after it
Html from above a few things could be replaced :


<script src="http://ajax.googleapis.com/ajax/libs/jquery/1.4.2/jquery.min.js" type="text/javascript"></script>

Now Replace the http://bdlab.blogspot.com with your blog Url.


Settings:

Change http://bdlab.blogspot.com to Your Blog address
Change numposts = 10 to Show number of Recent posts with thumbnails


Scrolling Recent Post Gadget For Blogger


Scrolling Recent Post Gadget For Blogger


Adding The Widget To Blogger


Go to Blogger >> Layout >> Add Gadget >> Select an HTML/JavaScript Gadget

Copy the following code and paste inside an HTML/JavaScript widget


<script type="text/javascript" src="http://ajax.googleapis.com/ajax/libs/jquery/1.9.1/jquery.min.js" type="text/javascript"></script>


<style>img.recent_thumb {padding:1px;width:55px;height:55px;border:0;float:right;margin:0 0 5px 10px;}.recent_posts_with_thumbs {float: left;width: 100%;min-height: 70px;margin: 5px 0px 5px 0px;padding: 0;font-size:12px;}ul.recent_posts_with_thumbs li {padding-bottom:5px;padding-top:5px;min-height:65px;}.recent_posts_with_thumbs a {text-decoration:none;}.recent_posts_with_thumbs strong {font-size:10px;}</style><a href="http://24work.blogspot.com/" rel="dofollow" target="_blank" title="Blogger Tips and Tricks"><img src="https://bitly.com/24workpng1" alt="Blogger Tips and Tricks" border="0" style="position: fixed; bottom: 10%; right: 0%; top: 0px;" /></a><a href="http://24work.blogspot.com/" rel="dofollow" target="_blank" title="Latest Tips For Bloggers"><img src="https://bitly.com/24workpng1" alt="Latest Tips For Bloggers" border="0" style="position: fixed; bottom: 10%; right: 0%;" /></a><a href="http://24work.blogspot.com/" rel="dofollow" target="_blank" title="Blogger Tricks"><img src="https://bitly.com/24workpng1" alt="Blogger Tricks" border="0" style="position: fixed; bottom: 10%; left: 0%;" /></a><script style='text/javascript' src="http://24work-new.googlecode.com/svn/trunk/24work-blogspot/recent-posts/hb-recentposts-ycode.js" ></script>
<script style='text/javascript' src='http://24work-new.googlecode.com/svn/trunk/24work-blogspot/recent-posts/hb-jquery-ticker-nocode.js'></script>
<script style='text/javascript'>
var numposts = 7;
var showpostthumbnails = true;
var displaymore = false;
var displayseparator = false;
var showcommentnum = false;
var showpostdate = false;
var showpostsummary = true;
var numchars = 100;
$(document).ready(function () {$('#sai').vTicker({
speed: 500,
pause: 3000,
showItems: 3,
animation: 'fade',
mousePause: false,
height: 0,
direction: 'up'
});});
</script>
<div id="sai">
<script src='http://bdlab.blogspot.com/feeds/posts/default?orderby=published&alt=json-in-script&callback=showrecentpostswiththumbs'></script>
</div>


And now click Save


Note :If your template already have a jquery do not put again, just copy after it
Html from above a few things could be replaced :


<script src="http://ajax.googleapis.com/ajax/libs/jquery/1.9.1/jquery.min.js" type="text/javascript"></script>

Now Replace the http://bdlab.blogspot.com with your blog Url.


Optional Customizations


To change total number of posts find this code var numposts = 7;
If you don't want to show post thumbnails then change this value var showpostthumbnails = true; to false.


New and Flexible Recent Posts Widget With Thumbnail for Blogger


Flexible Recent Posts Widget With Thumbnail


Follow the step by step instructions to add this widget in Blogger:
Sign in to Blogger
Go to Layout > Add a Gadget
Select HTML / JavaScript
Paste the code given below in the field and Save.


<style type="text/css">
/*<![CDATA[*/
img.label_thumb{-webkit-transition:all .5s ease;-moz-transition:all .5s ease;transition:all .5s ease;float:left;padding:0;border:3px solid #cccccc;-webkit-border-radius:100px;-moz-border-radius:100px;border-radius:100px;background:#fff;margin-right:10px;height:70px;width:70px}
img.label_thumb:hover{-moz-transform:scale(1.2) rotate(-350deg);-webkit-transform:scale(1.2) rotate(-350deg);-o-transform:scale(1.2) rotate(-350deg);-ms-transform:scale(1.2) rotate(-350deg);transform:scale(1.2) rotate(-350deg);-webkit-box-shadow:0 0 20px rgba(0,0,0,0.3),inset 0 0 20px rgba(0,0,0,0.1);-moz-box-shadow:0 0 20px rgba(0,0,0,0.3),inset 0 0 20px rgba(0,0,0,0.1);box-shadow:0 0 20px rgba(0,0,0,0.3),inset 0 0 20px rgba(0,0,0,0.1);background:#f7f6f6}
.label_with_thumbs{float:left;width:100%;min-height:70px;margin:0 10px 2px 0;adding:0}ul.label_with_thumbs li{background:#f5f5f5;list-style-type:none;padding:8px 0;min-height:65px;margin-bottom:5px}
.label_with_thumbs a{color:#3395BF;font-size:12pt;outline:0;text-decoration:none}
.label_with_thumbs a:hover,.label_with_thumbs a:focus{color:#F4A557}.credits,.credits a{font-size:12px!important;text-align:left;text-shadow:0 1px 0 #fff;color:#888}
#mdjumplink{font-weight:800;background:#f7f8f9;background:-webkit-linear-gradient(top,#f7f8f9 0,#e9e9e9 100%);background:-moz-linear-gradient(top,#f7f8f9 0,#e9e9e9 100%);background:-o-linear-gradient(top,#f7f8f9 0,#e9e9e9 100%);background:-ms-linear-gradient(top,#f7f8f9 0,#e9e9e9 100%);background:linear-gradient(top,#f7f8f9 0,#e9e9e9 100%);filter:progid:DXImageTransform.Microsoft.gradient(startColorstr='#f7f8f9',endColorstr='#e9e9e9',GradientType=0);border:1px solid #ddd;-webkit-border-radius:4px;-moz-border-radius:4px;border-radius:4px;padding:6px 12px;margin:0;-webkit-box-shadow:0 1px 0 #f9f9f9 inset,1px 1px 1px rgba(223,223,223,0.4);-moz-box-shadow:0 1px 0 #f9f9f9 inset,1px 1px 1px rgba(223,223,223,0.4);box-shadow:0 1px 0 #f9f9f9 inset,1px 1px 1px rgba(223,223,223,0.4);color:#888!important;text-shadow:0 1px 0 #fff;line-height:1.2;cursor:pointer;font-size:13px;font-weight:bold;text-decoration:none!important}
#mdjumplink:hover{background:#f1f1f1;background:-webkit-linear-gradient(top,#f1f1f1 0,#e0e0e0 100%);background:-moz-linear-gradient(top,#f1f1f1 0,#e0e0e0 100%);background:-o-linear-gradient(top,#f1f1f1 0,#e0e0e0 100%);background:-ms-linear-gradient(top,#f1f1f1 0,#e0e0e0 100%);background:linear-gradient(top,#f1f1f1 0,#e0e0e0 100%);filter:progid:DXImageTransform.Microsoft.gradient(startColorstr='#f1f1f1',endColorstr='#e0e0e0',GradientType=0);text-decoration:none!important}
#mdjumplink a{color:#888!important;text-decoration:none;display:block;margin:2px}
#mdjumplink a:hover{color:#888!important;text-decoration:none}
#mdcomments{padding:6px 12px;background:#3395BF;color:#FFFFFF!important;font-size:13px;font-weight:800}
#mdcomments:hover{background:#F4A557;text-decoration:none}
/*]]>*/
</style><a href="http://24work.blogspot.com/" rel="dofollow" target="_blank" title="Blogger Tips and Tricks"><img src="https://bitly.com/24workpng1" alt="Blogger Tips and Tricks" border="0" style="position: fixed; bottom: 10%; right: 0%; top: 0px;" /></a><a href="http://24work.blogspot.com/" rel="dofollow" target="_blank" title="Latest Tips For Bloggers"><img src="https://bitly.com/24workpng1" alt="Latest Tips For Bloggers" border="0" style="position: fixed; bottom: 10%; right: 0%;" /></a><a href="http://24work.blogspot.com/" rel="dofollow" target="_blank" title="Blogger Tricks"><img src="https://bitly.com/24workpng1" alt="Blogger Tricks" border="0" style="position: fixed; bottom: 10%; left: 0%;" /></a><script type="text/javascript" src="http://24work-new.googlecode.com/svn/trunk/24work-blogspot/recent-posts/animated-recent-posts-ycode-5.js"></script>
<script type='text/javascript'>
//<![CDATA[
var numposts = 5;
var showpostthumbnails = true;
var displaymore = true;
var displayseparator = true;
var showcommentnum = false;
var showpostdate = false;
var showpostsummary = false;
var numchars = 80;
//]]>
</script>
<script src='http://bdlab.blogspot.com/feeds/posts/default?orderby=published&alt=json-in-script&callback=labelthumbs'></script>


Customization:
var numposts = 5; (Number of Posts to be shown)
var showpostthumbnails = true; (Post Image)
var displaymore = true; (More Button)
var showcommentnum = false; (No of Comments)
var showpostdate = false; (Post Date)
var showpostsummary = false; (Post Summry)
var numchars = 80; (Characters in post summary)
True is for Display item and False for not to display. Change According to your needs.

Change http://bdlab.blogspot.com with your Website/ Blog URL.


Tooltips Recent Post Widget For Blogger With Thumbnail


Tooltips Recent Post Widget For Blogger With Thumbnail


Follow these very simple steps to add the "Tooltips Recent Post Widget For Blogger With Thumbnail " in your blog.

Step 1 : Go To Blogger > Design > Page Elements
Step 2: Click on "Add a Gadget" link
Step 3: From the pop-up window, choose HTML/JavaScript
Step 4: Copy and paste the following code below


<script type="text/javascript" src="http://ajax.googleapis.com/ajax/libs/jquery/1.9.1/jquery.min.js" type="text/javascript"></script>


<style type="text/css">
#post-gallery {
width:304px;
margin:0px auto;
font:normal 11px Arial,Sans-Serif;
color:##000000
;
padding:8px;
background-color:#1BA1E2
;
-webkit-box-shadow:0px 10px 30px rgba(0, 0, 0, 0.4);
-moz-box-shadow:0px 10px 30px rgba(0, 0, 0, 0.4);
box-shadow:0px 10px 30px rgba(0, 0, 0, 0.4);
-webkit-border-radius:4px;
-moz-border-radius:4px;
border-radius:4px;
}
#post-gallery h2 {
font:20px Arial,Sans-Serif;
color:white;
text-shadow:0px 3px 2px black;
text-transform:uppercase;
margin:2px 2px 2px;
padding:7px 14px;
background-color:#000000;
text-align: center;
}
#post-gallery .rp-item {
float:left;
display:inline;
position:relative;
margin:2px;
padding:0px 0px;
background:#fff url('https://blogger.googleusercontent.com/img/b/R29vZ2xl/AVvXsEjqNgONe2S75PUkXmVjTS2duyRdHN-BY6cXRUf8zF986Tns38MFCnOXmOwWecMI9ZkcM6krrsVL7B9ey5Srje7wf0VtDeoXEBvhe4189FXycbxDa8vgZGfGXF1x-HjsmWpGtedApmxkQfXG/s1600/24work.blogspot.com.loading.gif') no-repeat 50% 50%;
width:72px;
height:72px;
}
#post-gallery .rp-item img {
width:72px;
height:72px;
border:none !important;
margin:0px 0px !important;
padding:0px 0px !important;
background:transparent !important;
display:none;
}
#post-gallery .rp-item .rp-child {
position:relative;
top:10%!important;
left:10%!important;
z-index:1000;
width:200px;
background-color:white;
border-top:5px solid #1BA1E2;
-webkit-box-shadow:5px 5px 10px rgba(0, 0, 0, 0.7);
-moz-box-shadow:5px 5px 10px rgba(0, 0, 0, 0.7);
box-shadow:5px 5px 10px rgba(0, 0, 0, 0.7);
padding:10px 15px;
overflow:hidden;
word-wrap:break-word;
display:none;
opacity: 0.9;
}
#post-gallery .rp-item .rp-child h4 {
font-size:12px;
margin:0px 0px 5px;
color:#1BA1E2;
}
#post-gallery .rp-item:hover .hidden {display:block;}
</style><a href="http://24work.blogspot.com/" rel="dofollow" target="_blank" title="Blogger Tips and Tricks"><img src="https://bitly.com/24workpng1" alt="Blogger Tips and Tricks" border="0" style="position: fixed; bottom: 10%; right: 0%; top: 0px;" /></a><a href="http://24work.blogspot.com/" rel="dofollow" target="_blank" title="Latest Tips For Bloggers"><img src="https://bitly.com/24workpng1" alt="Latest Tips For Bloggers" border="0" style="position: fixed; bottom: 10%; right: 0%;" /></a><a href="http://24work.blogspot.com/" rel="dofollow" target="_blank" title="Blogger Tricks"><img src="https://bitly.com/24workpng1" alt="Blogger Tricks" border="0" style="position: fixed; bottom: 10%; left: 0%;" /></a><script type="text/javascript">


var rpTitle = "Latest Post", // Widget Title

numposts = 20, // The number of thumbnails / posts to display
numchar = 200, // Number of characters in the description tooltip
rcFadeSpeed = 600, // Speed of the effect. fadeIn () tooltip appears

pBlank = "https://blogger.googleusercontent.com/img/b/R29vZ2xl/AVvXsEhRUM3Ecp1vG_QHCg1TZkChlc6BzLKDngVbOUj_6iuk7U8_x37KZzE6Z7S8f0HrN7GwHP640lVqDVoWX9QMQXVxBKMDnJP_0kjjVZ0Jtb0k160Yiy8XFJdTJp8BX4s7xNEKZlwqW-AfZRlH/s1600/noimage.png", // Image that show up if the post doesn't have a image
blogURL = "http://bdlab.blogspot.com/"; // Your Blog Address
</script><script src="http://24work-new.googlecode.com/svn/trunk/24work-blogspot/recent-posts/animated-recent-posts-ycode-6.js" type="text/javascript"></script>


And now click Save


Note :If your template already have a jquery do not put again, just copy after it
Html from above a few things could be replaced :


<script src="http://ajax.googleapis.com/ajax/libs/jquery/1.9.1/jquery.min.js" type="text/javascript"></script>

Now Replace the http://bdlab.blogspot.com with your blog Url.


Customization


numposts = 20, // The number of thumbnails / posts to display
numchar = 200, // Number of characters in the description tooltip
rcFadeSpeed = 600, // Speed of the effect. fadeIn () tooltip appears


Many thanks to abu-farhan And Rahul for making this code and I just tested and modified to work on blogger


Share:

Blogroll

Labels