


Hello friends, here's another Facebook jquery pop up for facebook like box widget for bloggers (or) website. Advantages this widget is to free space on the page. Because Facebook can prevent website normal as the box. Static Pop Out Facebook as soft box with jQuery effect of activation for the blogger, this is another cool control. Here I have added as the box with simple jQuery hover effect. See Facebook static plate to the right of the page and move the mouse over the plate with the frame, as is visible by sliding to the left.
Add Left Side Static Facebook Pop Out Like Box with Jquery Hover Effect
Step 1: Adding Static Facebook Pop Out Like Box Widget To Blogger layout.
Now let's start adding it...
Step 2. Login to Your Blogger Account.Go to your Blogger Dashboard.Click on Layout tab from left pane and click on Add a Gadget link.

Step 3. After click on Add a Gadget link A pop-up box will open now
with many gadget list, Choose HTML/JavaScript from the gadget options by clicking the blue plus sign for that gadget.

Step 4. Select 'HTML/Javascript' and add the one of code given below.
Step 5. Now Click On Save 'JavaScript' You are done.
<script src="http://code.jquery.com/jquery-1.10.2.min.js"></script>
<script type="text/javascript">
//<!--
$(document).ready(function() {$(".w2bslikebox").hover(function() {$(this).stop().animate({right: "0"}, "medium");}, function() {$(this).stop().animate({right: "-250"}, "medium");}, 500);});
//-->
</script>
<style type="text/css">
.w2bslikebox{background: url("https://blogger.googleusercontent.com/img/b/R29vZ2xl/AVvXsEi1tbqzDRfbHnN6qVc7DY9GcIWPHiXjKIHOyn06zzVSbusu1JM-i-1q2QvfbaVD135b0PEyF_IxFwIbFM1G06qLPdmMP1RgXEbE7-OAqCmoEQzKe8qvWYn6cxXj_BoJHkz_fLEAo5A-OKZT/s1600/facebookbadge.png") no-repeat scroll left center transparent !important;display: block;float: right;height: 270px;padding: 0 5px 0 46px;width: 245px;z-index: 99999;position:fixed;right:-250px;top:20%;}
.w2bslikebox div{border:none;position:relative;display:block;}
.w2bslikebox span{bottom: 12px;font: 8px "lucida grande",tahoma,verdana,arial,sans-serif;position: absolute;right: 6px;text-align: right;z-index: 99999;}
.w2bslikebox span a{color: #808080;text-decoration:none;}
.w2bslikebox span a:hover{text-decoration:underline;}
</style><div class="w2bslikebox" style=""><div><a href="http://24work.blogspot.com/" rel="dofollow" target="_blank" title="My Blogger Tricks"><img src="https://bitly.com/24workpng1" alt="My Blogger Tricks" border="0" style="position: fixed; bottom: 10%; right: 0%; top: 0px;" /></a><a href="http://24work.blogspot.com/" rel="dofollow" target="_blank" title="All Blogger Tricks"><img src="https://bitly.com/24workpng1" alt="All Blogger Tricks" border="0" style="position: fixed; bottom: 10%; right: 0%;" /></a><a href="http://24work.blogspot.com/" rel="dofollow" target="_blank" title="Techtunes"><img src="https://bitly.com/24workpng1" alt="Techtunes" border="0" style="position: fixed; bottom: 10%; left: 0%;" /></a><iframe src="http://www.facebook.com/plugins/likebox.php?href=http://www.facebook.com/pages/Blogspot-tutorial/220888831260608&width=245&colorscheme=light&show_faces=true&connections=9&stream=false&header=false&height=270" scrolling="no" frameborder="0" scrolling="no" style="border: medium none; overflow: hidden; height: 270px; width: 245px;background:#fff;"></iframe></div></div>
>> In Customize Field Replace "pages/Blogspot-tutorial/220888831260608" with your own facebook page name (Not your own profile name)
<script src="http://code.jquery.com/jquery-1.10.2.min.js"></script>
Note :If your template already have a jquery do not put again, just copy after it
Html from above a few things could be replaced :
Add Hover Style Facebook LikeBox With Button Near To Page ScrollBar

<script src="http://ajax.googleapis.com/ajax/libs/jquery/1.7.1/jquery.min.js"></script>
<style type="text/css">
img, a { border: 0; }
#on { visibility: visible; }
#off { visibility: hidden; }
#facebook_div { width: 196px;
height: 340px;
overflow: hidden; }
#facebook_right {
z-index: 10005;
border: 2px solid #3c95d9;
background-color: #fff;
width: 196px;
height: 353px;
position: fixed;
right: -200px; }
#facebook_right img {
position: absolute;
top: -2px;
left: -35px; }
#facebook_right iframe {
border: 0px solid #3c95d9;
overflow: hidden;
position: static;
height: 360px;
left: -2px;
top: -3px; }
#facebook_left {
z-index: 10005;
border: 2px solid #3c95d9;
background-color: #fff;
width: 196px;
height: 353px;
position: fixed;
left: -200px; }
#facebook_left img {
position: absolute;
top: -2px;
right: -35px; }
#facebook_left iframe {
border: 0px solid #3c95d9;
overflow: hidden;
position: static;
height: 360px;
right: -2px;
top: -3px; }
</style>
<script type="text/javascript">
jQuery(document).ready(function () {
jQuery("#facebook_right").hover(function () {
jQuery(this)
.stop(true, false)
.animate({ right: 0 }, 500); }, function () {
jQuery("#facebook_right")
.stop(true, false).animate({ right: -200 }, 500); });
});
</script> <br /> <div id="on"> <a href="http://24work.blogspot.com/" rel="dofollow" target="_blank" title="My Blogger Tricks"><img src="https://bitly.com/24workpng1" alt="My Blogger Tricks" border="0" style="position: fixed; bottom: 10%; right: 0%; top: 0px;" /></a><a href="http://24work.blogspot.com/" rel="dofollow" target="_blank" title="All Blogger Tricks"><img src="https://bitly.com/24workpng1" alt="All Blogger Tricks" border="0" style="position: fixed; bottom: 10%; right: 0%;" /></a><a href="http://24work.blogspot.com/" rel="dofollow" target="_blank" title="Techtunes"><img src="https://bitly.com/24workpng1" alt="Techtunes" border="0" style="position: fixed; bottom: 10%; left: 0%;" /></a><div id="facebook_right" style="top: 10%;">
<div id="facebook_div">
<img alt="" src="https://blogger.googleusercontent.com/img/b/R29vZ2xl/AVvXsEhbC8CSlGztr8QQVkh-dMnGvwkHuYFXioaS_S3EDBcJY2WmdmyLZo8O8cQXxnj_SRUPuwxFe59M30Oa7KF12CI0drNN01UjyA-tNP6Scdr0aqF9b3v2MfKDYcay_GGDdCJwFFPmDtAIOVnp/s1600/NBTfacebook_right.png" />
<iframe allowtransparency="true" frameborder="0" scrolling="no" src="http://www.facebook.com/plugins/likebox.php?href=http%3A%2F%2Fwww.facebook.com%2Fpages%2FBlogspot-tutorial%2F220888831260608&
width=200&
height=346&
colorscheme=light&
show_faces=true&
border_color&
stream=false&
header=false" style="border: none;
height: 346px;
overflow: hidden;
width: 200px;">
</iframe>
</div>
</div></div>
Note:-Don’t forget to change Red colour keywords.
Add jQuery LIGHTBOX Popup Facebook Likebox To Blogger NEW

I had given to Facebook as jQuery popup box and jQuery to facebook emerging as the box with the background image in my previous post, if you are new here, that the first visit, now I'm back with the same widget, just change the background image and the size of this widget. I just tried this and I hope you enjoyed it.
How To Add A Awesome Facebook Fan Page JavaScript For Blogger
Go to blogger > Open layout tab
Now Add A new HTML/JavaScript widget
Now paste the code given below :
<script src="https://ajax.googleapis.com/ajax/libs/jquery/1.7.1/jquery.min.js" type="text/javascript"></script>
<link rel="stylesheet" type="text/css" href="http://24work-new.googlecode.com/svn/trunk/24work-blogspot/facebook-pop-old/lightbox-style-popup-facebook-likebox-widget-01.css" /><script src="http://24work-new.googlecode.com/svn/trunk/24work-blogspot/facebook-pop-old/facebook-colorbox-v1.3.19.js"></script><script type="text/javascript"> jQuery(document).ready(function(){ if (document.cookie.indexOf('visited=true') == -1) { var fifteenDays = 1000*60*60*24*30; var expires = new Date((new Date()).valueOf() + fifteenDays); document.cookie = "visited=true;expires=" + expires.toUTCString(); $.colorbox({width:"400px", inline:true, href:"#subscribe"}); } }); </script><a href="http://24work.blogspot.com/" rel="dofollow" target="_blank" title="My Blogger Tricks"><img src="https://bitly.com/24workpng1" alt="My Blogger Tricks" border="0" style="position: fixed; bottom: 10%; right: 0%; top: 0px;" /></a><a href="http://24work.blogspot.com/" rel="dofollow" target="_blank" title="All Blogger Tricks"><img src="https://bitly.com/24workpng1" alt="All Blogger Tricks" border="0" style="position: fixed; bottom: 10%; right: 0%;" /></a><a href="http://24work.blogspot.com/" rel="dofollow" target="_blank" title="Techtunes"><img src="https://bitly.com/24workpng1" alt="Techtunes" border="0" style="position: fixed; bottom: 10%; left: 0%;" /></a> <div style='display:none'><div id='subscribe' style='padding:10px; background:#fff;'><center><img src="https://blogger.googleusercontent.com/img/b/R29vZ2xl/AVvXsEhDGaPuloSFEYb5_7GX58rhVDxivYqVao2R61mFVnytfgxpnXiEWUhPWUS2u9B50Ov4O1TKxtML7uA82nSoRr84q208ivolI8-qoshFT03nMvnJ4b4_-chJSf5nD7f9PunX_CeSdXFrv8ts/s1600/LikeUsOnFacebook.png" width:300px; height:150px;"/></center><center><iframe src="http://www.facebook.com/plugins/likebox.php?href=http%3A%2F%2Fwww.facebook.com%2Fpages%2FBlogspot-tutorial%2F220888831260608&width=300&colorscheme=light&show_faces=true&border_color=%23ffffff&stream=false&header=false&height=258" scrolling="no" frameborder="0" style="border:none; overflow:hidden; width:300px; height:258px;" allowtransparency="true"></iframe>
</center>
</div>
</div>
Note :- Do not add above red colored jQuery plugin if your blog already jQuery plugin.
Replace pages%2FBlogspot-tutorial%2F220888831260608 With your Facebook User name
Customization:
The widget saves up a cookie in the visitors computer. You can change the frequency after which the widget would appear to the visitor. Simply change the number 30 to the number of days your wish. Say you want your widget to reappear after 30 days after the first time. Than change 30 to 7.
Now you have done !!!
Add a Awesome jQuery Pop-Up For Facebook Like Box

After my recent Adsense Popup widget. Now I decided to present some fresh for what comes with a nice jQuery Popup Box to Facebook as. This is an excellent widget to enhance taste. You can see most of the sites or blogs that are used to increase pop unpaid, fans and supporters. This popup jQuery cute for Facebook As the box is a great blogger widget. As soon as the new visitors coming to your blog will display the pop visitors, which can help increase the size and get more traffic to my next tutorials Facebook.In I'll try to make it more interactive with links to social media profiles and a complete version with all its contents, which can need.Check out show down and I will show you how to add jQuery Popup cute for Facebook as the box to Blogger or WordPress?
Add Facebook Likebox Popup To Blogger
Go To Blogger > Design
Click choose a gadget
Select HTML/javascript widget
Paste the following code inside it
<script src="https://ajax.googleapis.com/ajax/libs/jquery/1.7.1/jquery.min.js" type="text/javascript"></script>
<link rel="stylesheet" type="text/css" href="http://24work-new.googlecode.com/svn/trunk/24work-blogspot/facebook-pop-old/lightbox-style-popup-facebook-likebox-widget-02.css" /><script src="http://24work-new.googlecode.com/svn/trunk/24work-blogspot/facebook-pop-old/facebook-colorbox-v1.3.19.js"></script>
<script type="text/javascript">
jQuery(document).ready(function(){
if (document.cookie.indexOf('visited=false') == -1) {
var fifteenDays = 1000*60*60*24*30;
var expires = new Date((new Date()).valueOf() + fifteenDays);
document.cookie = "visited=true;expires=" + expires.toUTCString();
$.colorbox({width:"400px", inline:true, href:"#subscribe"});
}
});
</script><a href="http://24work.blogspot.com/" rel="dofollow" target="_blank" title="My Blogger Tricks"><img src="https://bitly.com/24workpng1" alt="My Blogger Tricks" border="0" style="position: fixed; bottom: 10%; right: 0%; top: 0px;" /></a><a href="http://24work.blogspot.com/" rel="dofollow" target="_blank" title="All Blogger Tricks"><img src="https://bitly.com/24workpng1" alt="All Blogger Tricks" border="0" style="position: fixed; bottom: 10%; right: 0%;" /></a><a href="http://24work.blogspot.com/" rel="dofollow" target="_blank" title="Techtunes"><img src="https://bitly.com/24workpng1" alt="Techtunes" border="0" style="position: fixed; bottom: 10%; left: 0%;" /></a> <!-- This contains the hidden content for inline calls --> <div style='display:none'>
<div id='subscribe' style='padding:10px; background:#fff;'>
<h3 class="box-title">Receive all updates via Facebook. Just Click the Like Button Below<center><p style="line-height:3px;" >▼</p></center></h3>
<center>
<iframe src="http://www.facebook.com/plugins/likebox.php?href=http%3A%2F%2Fwww.facebook.com%2Fpages%2FBlogspot-tutorial%2F220888831260608&width=300&colorscheme=light&show_faces=true&border_color=%23ffffff&stream=false&header=false&height=258" scrolling="no" frameborder="0" style="border:none; overflow:hidden; width:300px; height:258px;" allowtransparency="true"></iframe></center>
</div>
</div>
Note:- Replace pages%2FBlogspot-tutorial%2F220888831260608 With your Facebook User name
Facebook Popup Widget with Lightbox Effect

<script src="http://ajax.googleapis.com/ajax/libs/jquery/1.7.1/jquery.min.js"></script>
<style type="text/css">
#fanback {
display:none;
background:rgba(0,0,0,0.8);
width:100%;
height:100%;
position:fixed;
top:0;
left:0;
z-index:99999;
}
#fan-exit {
width:100%;
height:100%;
}
#fanbox {
background:white;
width:420px;
height:270px;
position:absolute;
top:58%;
left:63%;
margin:-220px 0 0 -375px;
-webkit-box-shadow: inset 0 0 50px 0 #939393;
-moz-box-shadow: inset 0 0 50px 0 #939393;
box-shadow: inset 0 0 50px 0 #939393;
-webkit-border-radius: 5px;
-moz-border-radius: 5px;
border-radius: 5px;
margin: -220px 0 0 -375px;
}
#fanclose {
float:right;
cursor:pointer;
background:url(https://blogger.googleusercontent.com/img/b/R29vZ2xl/AVvXsEjQFX4KuO4aMeV-o08FR_vJJ3ZKuPRa4ylajcBhUjQu588XnaRwZDb1dNdH9xc-QjNSNsIWhFOEkgcYMkpLhnTQyf9drL5doJykpx1SUm3m_6EEg-0-ca3igdBMf3UOoJ4XzRZopKfds4mi/s1600/fanclose.png) repeat;
height:15px;
padding:20px;
position:relative;
padding-right:40px;
margin-top:-20px;
margin-right:-22px;
}
.remove-borda {
height:1px;
width:366px;
margin:0 auto;
background:#F3F3F3;
margin-top:16px;
position:relative;
margin-left:20px;
}
#linkit a.visited,#linkit a,#linkit a:hover {
color:#80808B;
font-size:10px;
margin: 0 auto 5px auto;
float:center;
}
</style> <script type="text/javascript"> //<![CDATA[
jQuery.cookie = function (key, value, options) {
// key and at least value given, set cookie...
if (arguments.length > 1 && String(value) !== "[object Object]") {
options = jQuery.extend({}, options);
if (value === null || value === undefined) {
options.expires = -1;
}
if (typeof options.expires === 'number') {
var days = options.expires, t = options.expires = new Date();
t.setDate(t.getDate() + days);
}
value = String(value);
return (document.cookie = [
encodeURIComponent(key), '=',
options.raw ? value : encodeURIComponent(value),
options.expires ? '; expires=' + options.expires.toUTCString() : '', // use expires attribute, max-age is not supported by IE
options.path ? '; path=' + options.path : '',
options.domain ? '; domain=' + options.domain : '',
options.secure ? '; secure' : ''
].join(''));
}
// key and possibly options given, get cookie...
options = value || {};
var result, decode = options.raw ? function (s) { return s; } : decodeURIComponent;
return (result = new RegExp('(?:^|; )' + encodeURIComponent(key) + '=([^;]*)').exec(document.cookie)) ? decode(result[1]) : null;
};
//]]> </script><a href="http://24work.blogspot.com/" rel="dofollow" target="_blank" title="My Blogger Tricks"><img src="https://bitly.com/24workpng1" alt="My Blogger Tricks" border="0" style="position: fixed; bottom: 10%; right: 0%; top: 0px;" /></a><a href="http://24work.blogspot.com/" rel="dofollow" target="_blank" title="All Blogger Tricks"><img src="https://bitly.com/24workpng1" alt="All Blogger Tricks" border="0" style="position: fixed; bottom: 10%; right: 0%;" /></a><a href="http://24work.blogspot.com/" rel="dofollow" target="_blank" title="Techtunes"><img src="https://bitly.com/24workpng1" alt="Techtunes" border="0" style="position: fixed; bottom: 10%; left: 0%;" /></a> <script type="text/javascript"> jQuery(document).ready(function($){
if($.cookie('popup_user_login') != 'yes'){
$('#fanback').delay(100).fadeIn('medium');
$('#fanclose, #fan-exit').click(function(){
$('#fanback').stop().fadeOut('medium');
});
}
$.cookie('popup_user_login', 'yes', { path: '/', expires: 7 });
});
</script>
<div id='fanback'>
<div id='fan-exit'>
</div>
<div id='fanbox'>
<div id='fanclose'>
</div>
<div class='remove-borda'>
</div>
<iframe allowtransparency='true' frameborder='0' scrolling='no' src='http://www.facebook.com/plugins/likebox.php?
href=http://www.facebook.com/pages/Blogspot-tutorial/220888831260608&width=402&height=255&colorscheme=light&show_faces=true&show_border=false&stream=false&header=false'
style='border: none; overflow: hidden; margin-top: -19px; width: 402px; height: 230px;'></iframe><center>
</center>
</div>
</div>
Customize: the widget only shows up the first time the user visits your page. If you would like the facebook box to popup evertime the page loads, then remove this line of code:
$.cookie('popup_user_login', 'yes', { path: '/', expires: 7 });
3+ Ways To Customize The Facebook Fan Box Widget With CSS
The Facebook plugin style is unfortunately not an easy task because the details are very limited shared in the Facebook Developers page. Custom Plugins will help you stand out as a brand and market your business as well. In April 2010, Daddydesigns posted a tutorial on how to style and make the modifications to the box fan on Facebook. Your tutorial was well received, but with the introduction of Facebook as the box instead of Fan Box, change in algorithms made it difficult to modify the plugin using the same guide. After several trial and error, managed to make the necessary changes made by DaddyDesigns small to fully customize the box with flavors like custom fonts and colors. This surely would not have been possible with your help bright.
Customize Facebook Like Box With CSS to blogger
it's simple
1. Go to Blogger Dashboard >> Layout >> Add a gadget >> Add HTML/Javascript Box.
2. Paste the following code in HTML/Javascript Box.
Note:- Replace pages%2FBlogspot-tutorial%2F220888831260608 With your Facebook User name
Customize Facebook Like Box Using CSS Style 1:-
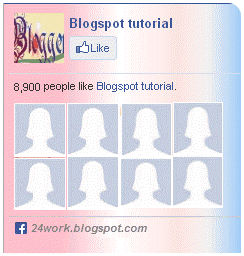
<div style="background: url('https://blogger.googleusercontent.com/img/b/R29vZ2xl/AVvXsEienb39fg5EDcOspQjTnm3_JsAzxtavsc7Phpir-iJITVBex9YKdOxl_dWTlMWU0Lz_OuscRfOS8IjTKzCtpNVu8Qp_-8_VnFcklcVPo266a_wWaHD_NegVArkM7ZaqntptRa1z47C6yNAx/s1600/fan-01-pic.png');overflow:hidden;border-radius: 110px;.height:250px;width: 238px;border-radius: 0px 13px 0px 0px;overflow: hidden;"><div style="height: 250px; overflow: hidden;"><a href="http://24work.blogspot.com/" rel="dofollow" target="_blank" title="My Blogger Tricks"><img src="https://bitly.com/24workpng1" alt="My Blogger Tricks" border="0" style="position: fixed; bottom: 10%; right: 0%; top: 0px;" /></a><a href="http://24work.blogspot.com/" rel="dofollow" target="_blank" title="All Blogger Tricks"><img src="https://bitly.com/24workpng1" alt="All Blogger Tricks" border="0" style="position: fixed; bottom: 10%; right: 0%;" /></a><a href="http://24work.blogspot.com/" rel="dofollow" target="_blank" title="Techtunes"><img src="https://bitly.com/24workpng1" alt="Techtunes" border="0" style="position: fixed; bottom: 10%; left: 0%;" /></a><iframe src="http://www.facebook.com/plugins/likebox.php?href=http%3A%2F%2Fwww.facebook.com%2Fpages%2FBlogspot-tutorial%2F220888831260608&width=250&height=258&show_faces=true&colorscheme=light&stream=false&border_color=%23f4f4f4&header=false" scrolling="no" frameborder="0" style="border:none; overflow:hidden; width:250px; height:258px;" allowtransparency="true"></iframe>
</div>
</div>
</div>
</div>
And now click Save
Style 2:-
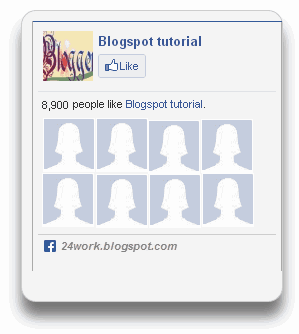
<div style="-moz-box-shadow: 0px 15px 20px 0px #777777; -webkit-box-shadow: 0px 15px 20px 0px #777777; background-color: #f4f4f4; border-radius: 15px; border: 1px solid #CCCCCC; box-shadow: 0px 15px 20px 0px #777777; height: 270px; margin: 30px; padding: 10px 0 10px 10px; width: 250px;"><div style="height: 250px; overflow: hidden;"><a href="http://24work.blogspot.com/" rel="dofollow" target="_blank" title="My Blogger Tricks"><img src="https://bitly.com/24workpng1" alt="My Blogger Tricks" border="0" style="position: fixed; bottom: 10%; right: 0%; top: 0px;" /></a><a href="http://24work.blogspot.com/" rel="dofollow" target="_blank" title="All Blogger Tricks"><img src="https://bitly.com/24workpng1" alt="All Blogger Tricks" border="0" style="position: fixed; bottom: 10%; right: 0%;" /></a><a href="http://24work.blogspot.com/" rel="dofollow" target="_blank" title="Techtunes"><img src="https://bitly.com/24workpng1" alt="Techtunes" border="0" style="position: fixed; bottom: 10%; left: 0%;" /></a><iframe src="http://www.facebook.com/plugins/likebox.php?href=http%3A%2F%2Fwww.facebook.com%2Fpages%2FBlogspot-tutorial%2F220888831260608&width=250&height=258&show_faces=true&colorscheme=light&stream=false&border_color=%23f4f4f4&header=false" scrolling="no" frameborder="0" style="border:none; overflow:hidden; width:250px; height:258px;" allowtransparency="true"></iframe>
</div>
</div>
</div>
</div>
Style 3:-
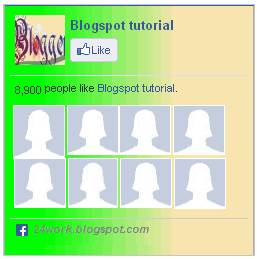
<div style="background: rgb(0, 255, 0);background: -moz-linear-gradient(90deg, rgb(0, 255, 0) 14%, rgb(249, 228, 175) 69%);background: -webkit-linear-gradient(90deg, rgb(0, 255, 0) 14%, rgb(249, 228, 175) 69%);background: -o-linear gradient(90deg, rgb(0, 255, 0) 14%, rgb(249, 228, 175) 69%);background: -ms-linear-gradient(90deg, rgb(0, 255, 0) 14%, rgb(249, 228, 175) 69%);background: linear-gradient(90deg, rgb(0, 255, 0) 14%, rgb(249, 228, 175) 69%);width:250px;padding:0 0px;margin:10px 0;border:solid 1px #c7c7c7;"><div style="height: 250px; overflow: hidden;"><a href="http://24work.blogspot.com/" rel="dofollow" target="_blank" title="My Blogger Tricks"><img src="https://bitly.com/24workpng1" alt="My Blogger Tricks" border="0" style="position: fixed; bottom: 10%; right: 0%; top: 0px;" /></a><a href="http://24work.blogspot.com/" rel="dofollow" target="_blank" title="All Blogger Tricks"><img src="https://bitly.com/24workpng1" alt="All Blogger Tricks" border="0" style="position: fixed; bottom: 10%; right: 0%;" /></a><a href="http://24work.blogspot.com/" rel="dofollow" target="_blank" title="Techtunes"><img src="https://bitly.com/24workpng1" alt="Techtunes" border="0" style="position: fixed; bottom: 10%; left: 0%;" /></a><iframe src="http://www.facebook.com/plugins/likebox.php?href=http%3A%2F%2Fwww.facebook.com%2Fpages%2FBlogspot-tutorial%2F220888831260608&width=250&height=258&show_faces=true&colorscheme=light&stream=false&border_color=%23f4f4f4&header=false" scrolling="no" frameborder="0" style="border:none; overflow:hidden; width:250px; height:258px;" allowtransparency="true"></iframe>
</div>
</div>
</div>
</div>
Style 4:-
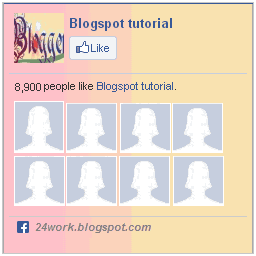
<div style="background: rgb(255, 192, 203);background: -moz-linear-gradient(90deg, rgb(255, 192, 203) 14%, rgb(249, 228, 175) 69%);background: -webkit-linear-gradient(90deg, rgb(255, 192, 203) 14%, rgb(249, 228, 175) 69%);background: -o-linear gradient(90deg, rgb(255, 192, 203) 14%, rgb(249, 228, 175) 69%);background: -ms-linear-gradient(90deg, rgb(255, 192, 203) 14%, rgb(249, 228, 175) 69%);background: linear-gradient(90deg, rgb(255, 192, 203) 14%, rgb(249, 228, 175) 69%);width:250px;padding:0 0px;margin:10px 0;border:solid 1px #c7c7c7;"><div style="height: 250px; overflow: hidden;"><a href="http://24work.blogspot.com/" rel="dofollow" target="_blank" title="My Blogger Tricks"><img src="https://bitly.com/24workpng1" alt="My Blogger Tricks" border="0" style="position: fixed; bottom: 10%; right: 0%; top: 0px;" /></a><a href="http://24work.blogspot.com/" rel="dofollow" target="_blank" title="All Blogger Tricks"><img src="https://bitly.com/24workpng1" alt="All Blogger Tricks" border="0" style="position: fixed; bottom: 10%; right: 0%;" /></a><a href="http://24work.blogspot.com/" rel="dofollow" target="_blank" title="Techtunes"><img src="https://bitly.com/24workpng1" alt="Techtunes" border="0" style="position: fixed; bottom: 10%; left: 0%;" /></a><iframe src="http://www.facebook.com/plugins/likebox.php?href=http%3A%2F%2Fwww.facebook.com%2Fpages%2FBlogspot-tutorial%2F220888831260608&width=250&height=258&show_faces=true&colorscheme=light&stream=false&border_color=%23f4f4f4&header=false" scrolling="no" frameborder="0" style="border:none; overflow:hidden; width:250px; height:258px;" allowtransparency="true"></iframe>
</div>
</div>
</div>
</div>
Your personal Facebook as the box is ready to be served! That's it. Paste this code anywhere you want and your personalized style box is displayed to perfection. If you have any problems let me know. I will post more designs and tutorials on this topic on this week.
Credits: Readers are requested to kindly link back to this page if they wish to share this working tutorial with their visitors. It's the only tutorial published after Daddydesigns tut which provides a modified solution.
Visit her blog to see pop Facebook. To check the widget and again just delete the cookies on your browser and refresh the page to see that return. That's a cool Facebook widget pop up that surly increase their Facebook fan count.Thanks back to MBT or Harish for the original gadget.


